Slant Six Forum
https://slantsix.org/forum/

Dodge Pioneer -61 225 Eaton M90
https://slantsix.org/forum/viewtopic.php?f=30&t=64612
Page 1 of 5

Author:  Markus-FIN [ Sun Mar 15, 2020 4:10 am ]
Post subject:  Dodge Pioneer -61 225 Eaton M90

Greetings everyone! This is my very first post to this forum. I have been lurkin here for over a decade, but finally decided to share my very own project.
First of all, this is my first engine project with a boost factor. I have a 1961 Dodge Pioneer 2D HT, which left the factory equipped with 225 slant six engine. I have owned this car for few years now. This is not my first or last slant six car though. But the most fun yet, it has been.

So, why supercharge the slant six if you could get a lot of fun fast and easy with a big block?
I do it because it's different and way more entertaining. And it's different here, in Finland where I live. Old american cars are more popular here than ever. But Valiants, Dusters, Darts and Aspens did conquer the hearts of FIN when they were new. And those cars came mostly with a slant six. And the elder people always remember to ask me when they see the DODGE lettering: "You have a six cylinder there, leaning little to the right?"

My goal here is to just to have something differerent and a few horsepower more. I'm not a racer nor do i have a need to go fast anywhere.

I have few rules to my build:

1. It needs to look stock(ish).
2. No fuel injection, just a carb
3. Keep cost low and experiment things

I do not own any special tools, lathes or mills. I have a bad cheapo chinese bench drill though.
Some say that Eaton cannot be used as draw thru setup, but I want to do it anyway.
And the plan is to use stock internals, no forged pistons or anything like that. Just keep the boost somewhere around 5 to 7 psi.

The Car

Image
Here she is as the day I bought her

Image
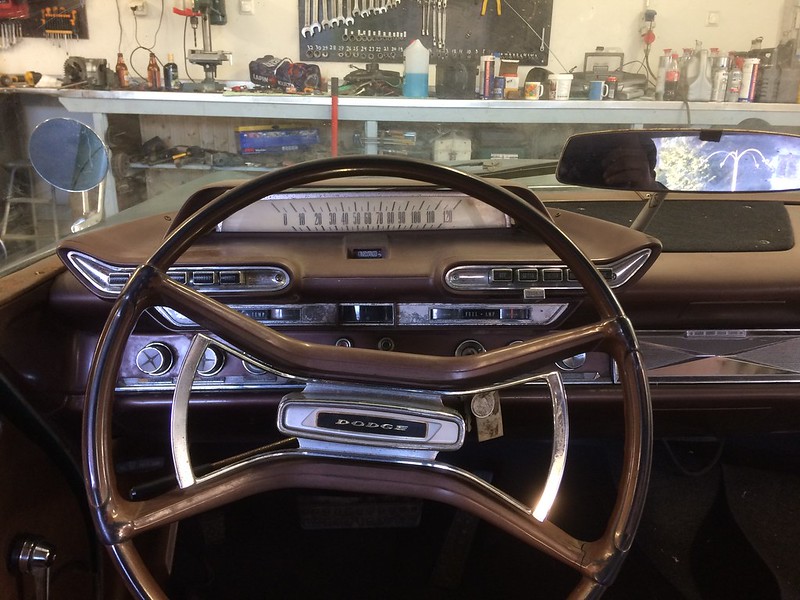
The view I absolutely love

Image
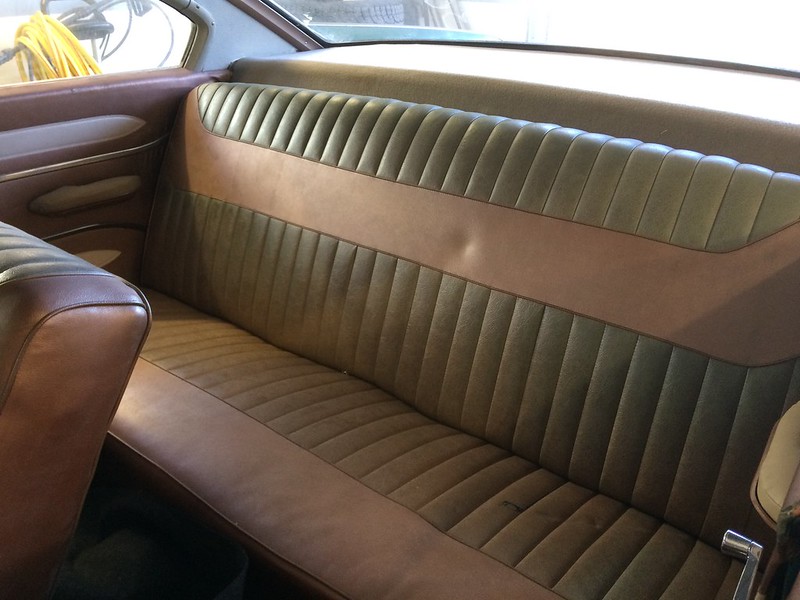
Pretty original interior, with few rips here and there

Image
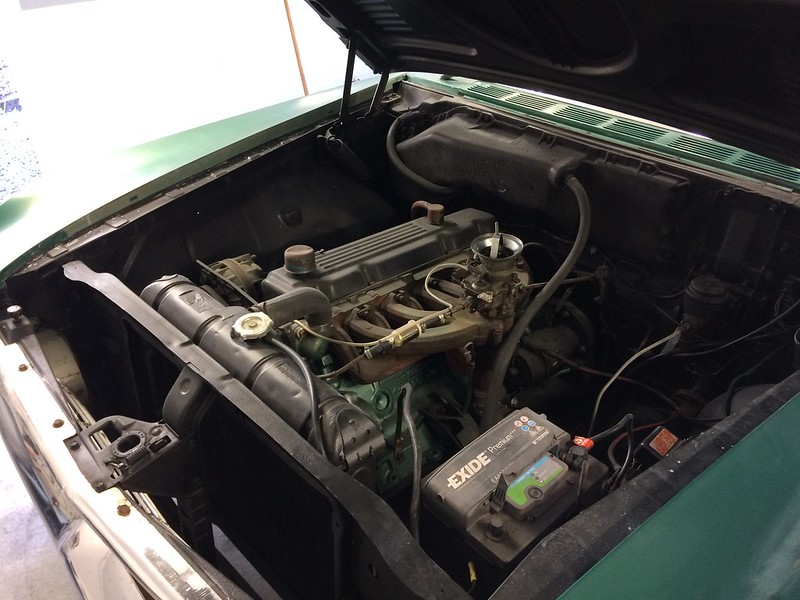
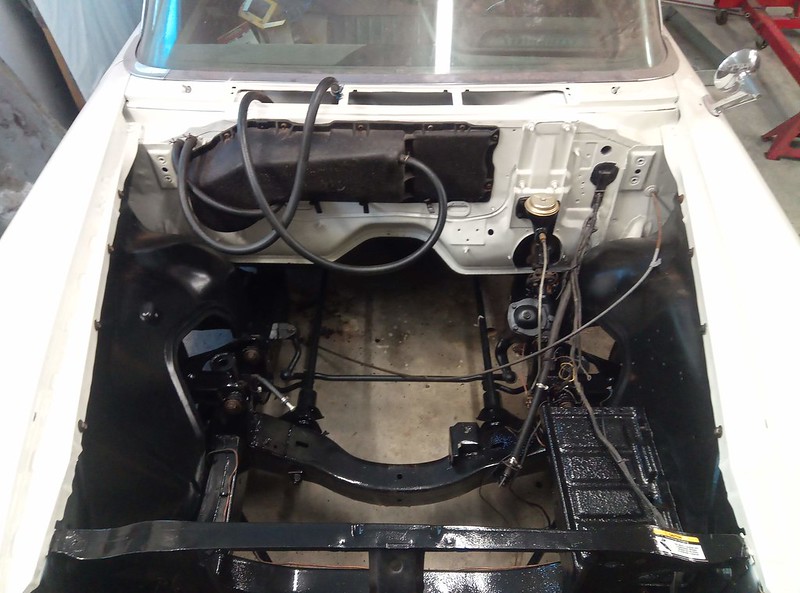
Engine bay looked like this. Engine had a poor mans ring job done, but was running very poorly. After a gasket kit to 1bbl Carter, it purred like a kitten. I drove the car like this for couple of summers, but then wanted to do something with it
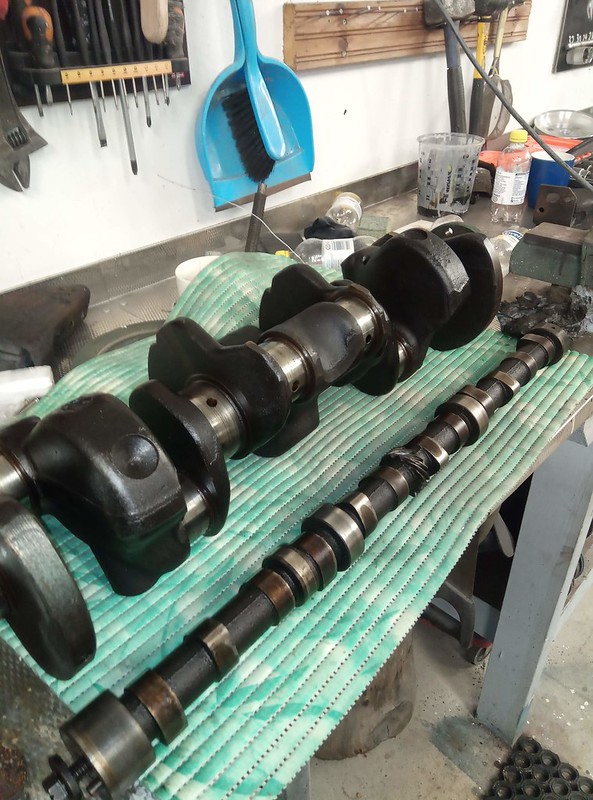
The Power Plant

Image
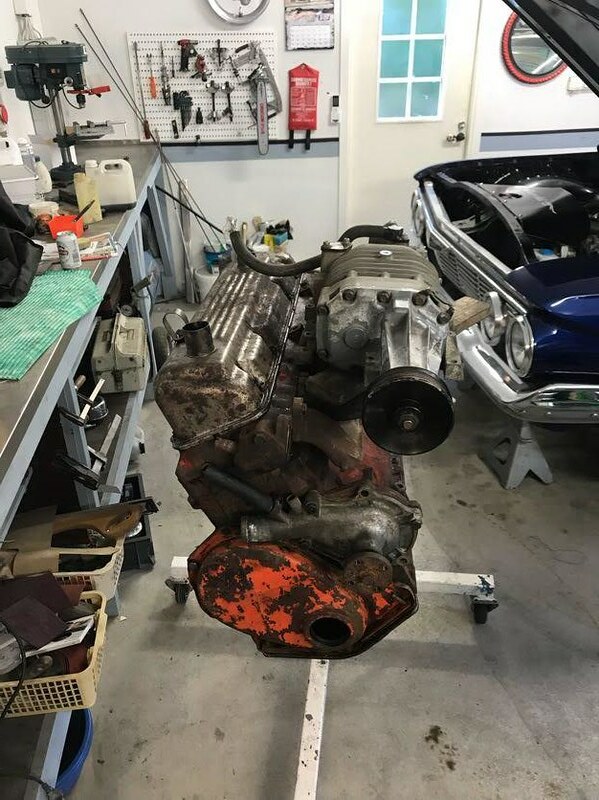
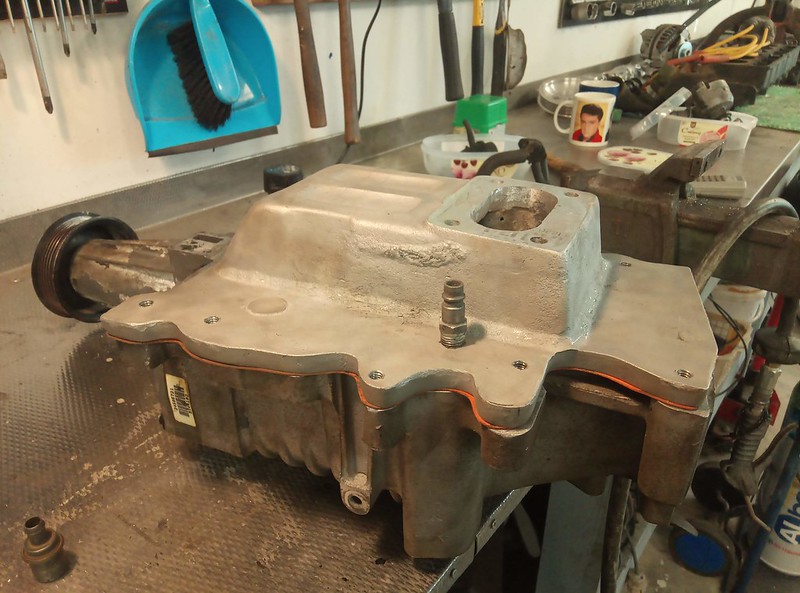
This is my empty mockup motor, that was used to test fit all the parts I was going to fabricate. The Eaton is from 3.8 Buick and bought it from eBay at $140.

Image
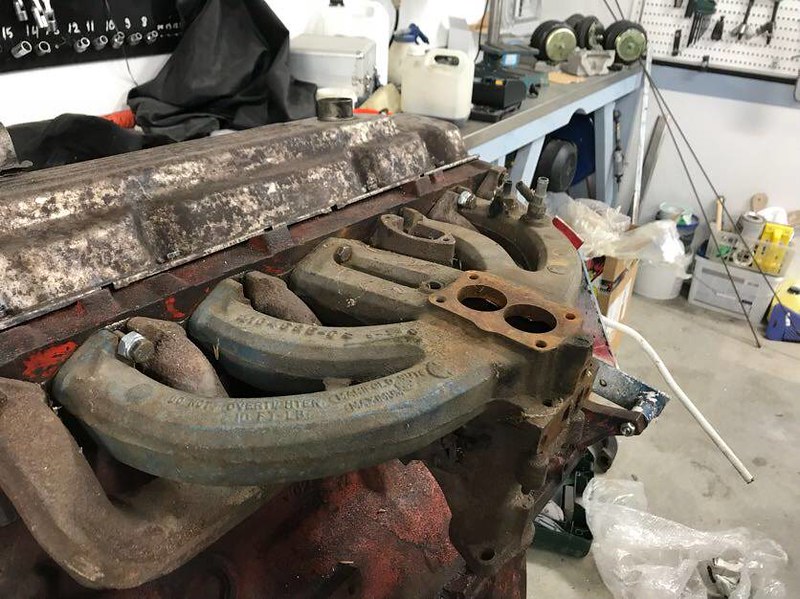
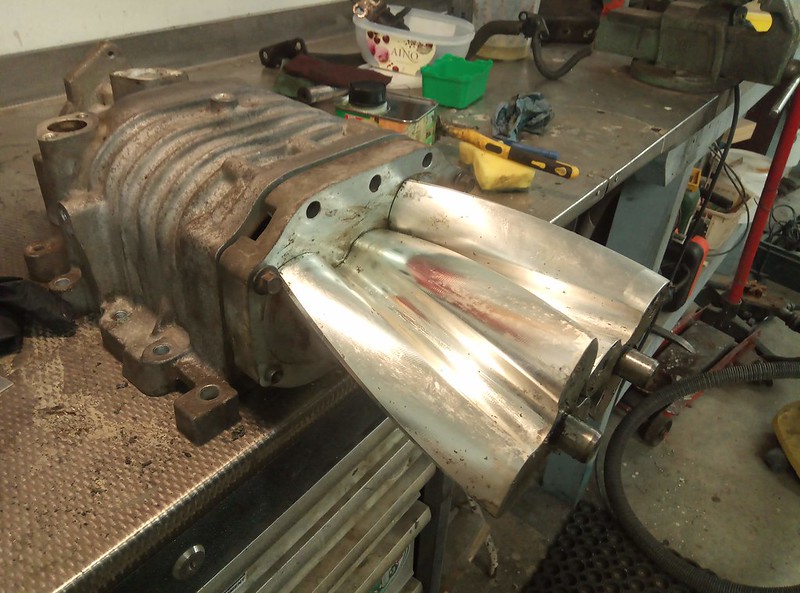
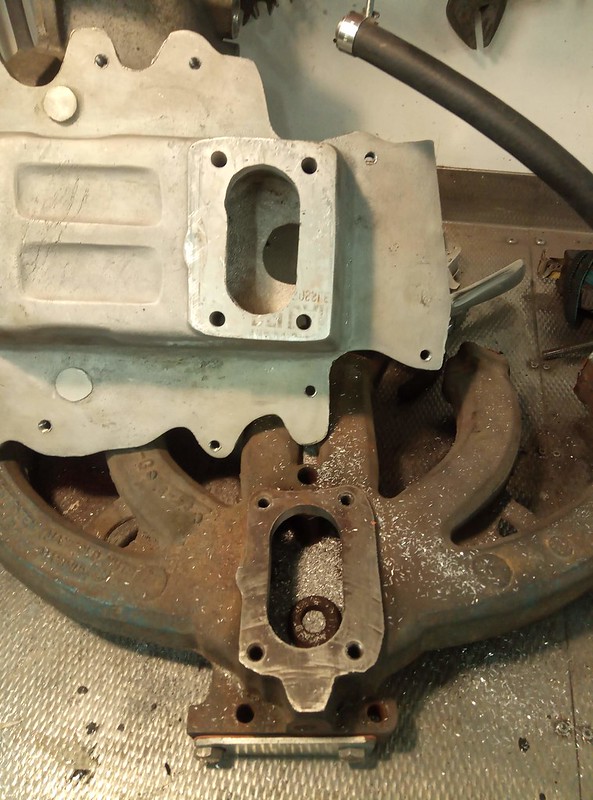
I wanted to use stock 2bbl super intake, rather than fancy ready to bolt on supercharger intake

Image
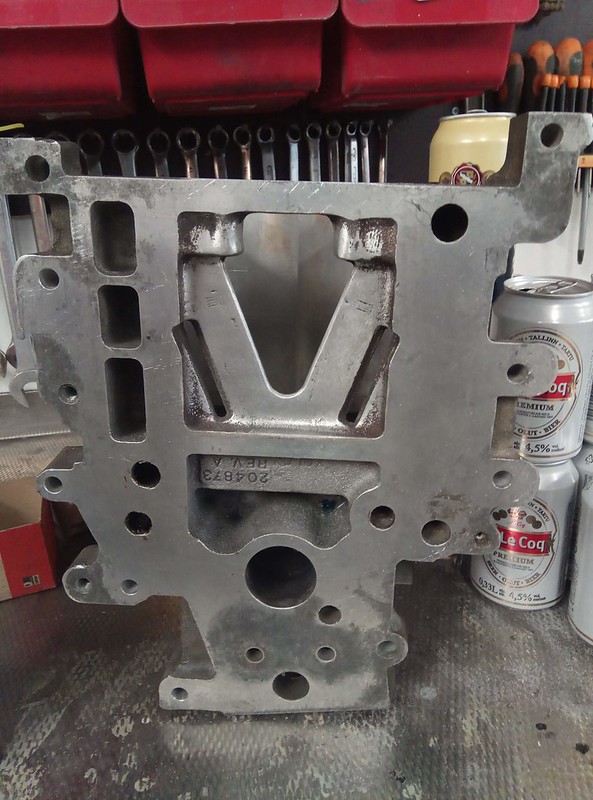
So I started to make adapter between the intake and Eaton. This part involves some wood working, casting sand and some molten aluminium

Image
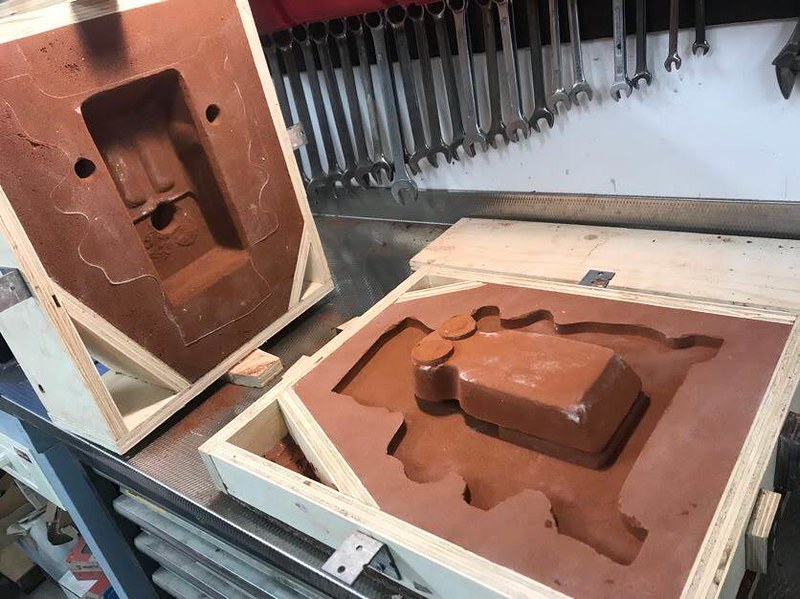
Here is the mold ready to be poured

Image
And the raw casting right after the pour

Image
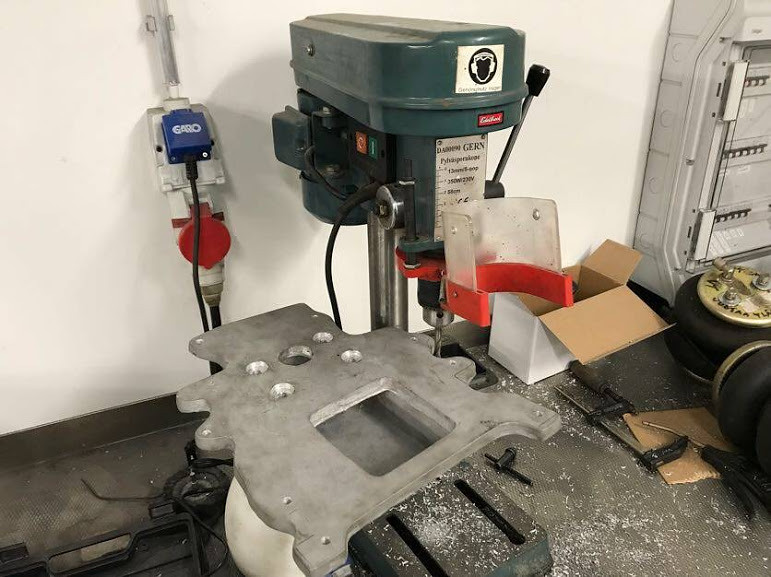
Like I said earlier, no special tools available. Just my chinese bench drill

Image
Careful measuring was done to line up the Eaton with crank pulley. My goal was to fit everything under the hood, but soon realized that with this setup it was impossible. The pulley end of Eaton would stick out of the hood line about 3/4 inch

Image
Fuel delivery will be done by this 45mm FAJS side draft carburetor. It's a cheap chinese copy of Weber. All Weber parts will be usable with FAJS. Some say these are bad, but some say these are better machined than Webers.. Who knows...

Image
To attach the carburetor to Eaton, involves some more casting to be done. Here is a foam pattern, going to be casted using the lost foam method

Image
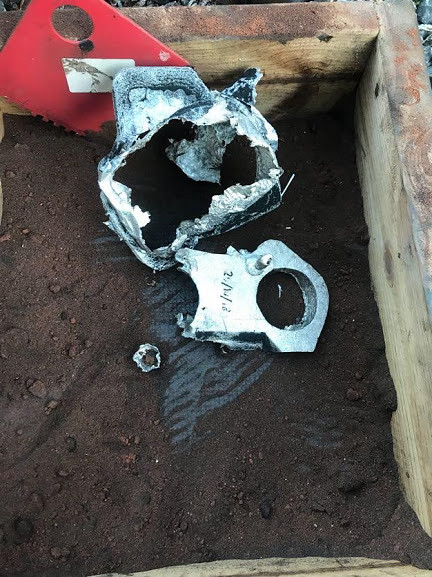
Not all goes as planned always. First pour went to ground and joined the gravel in my yard. There was too little sand under the pattern and the molten aluminium burned through the bottom of my flask

Image
After carving a new pattern, the second pour was a success.

Image
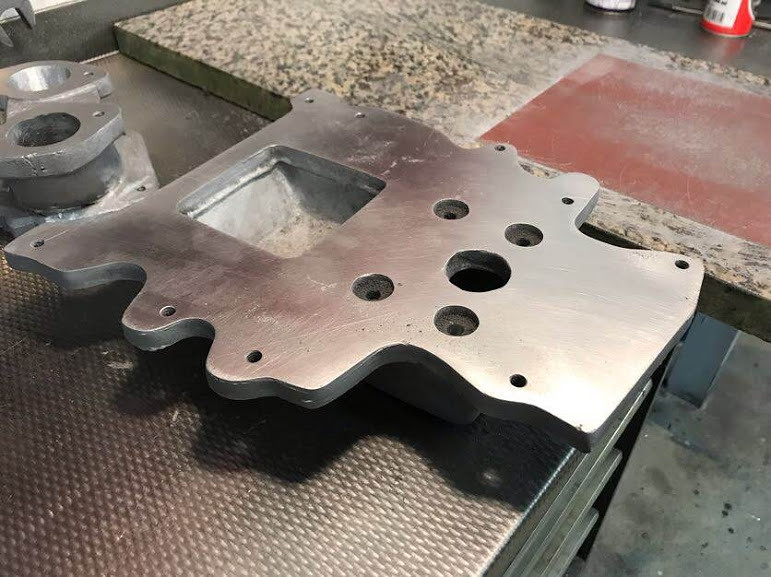
All mating surfaces were hand sanded with a papers glued to piece of stone table top. I could have sent them to a machine shop, but as mentioned earlier I try to keep the costs down. I'm a bit crazy anyway.

Image
Gasket to seal the Eaton to adapter was made from 1mm thick gasket material

Image
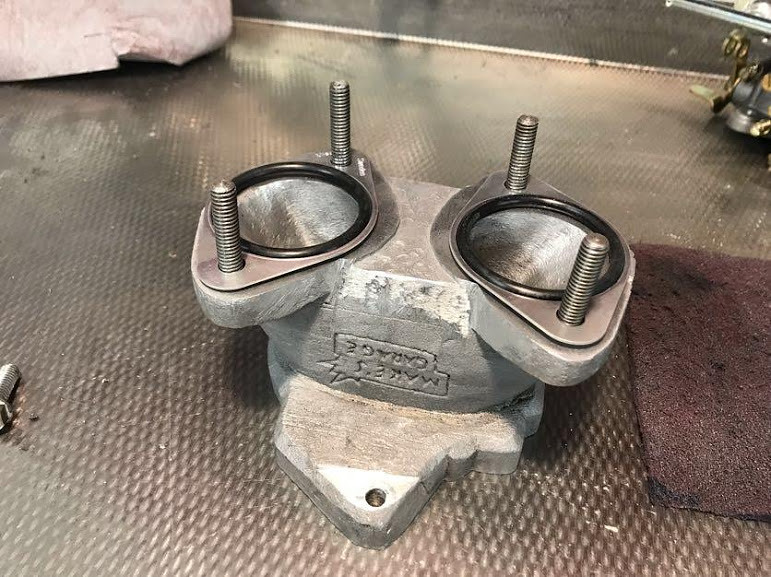
O-ring type seals used with the carburetor

Image
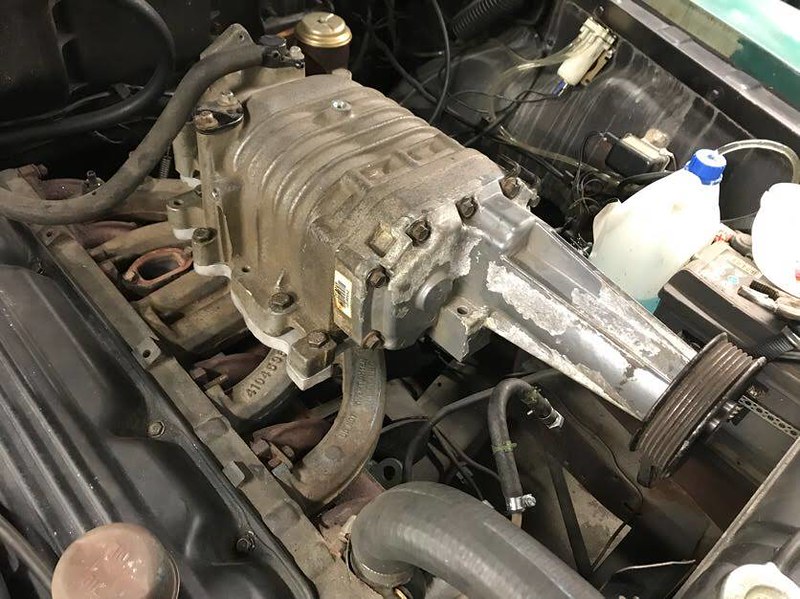
Crank serpentine pulley is a March Performance piece for a small block chevy. It's a perfect fit, after drilling the bolt holes just a little bit larger.

Image
This was the first test of belt tensioner locating. Really fast slapped together. Later, I will show you a bit better piece

So, here is a link to my youtube video of the first startup with Eaton setup. It fired up nice, without any usual hick ups.
https://www.youtube.com/watch?v=LzTLjJH4hTM


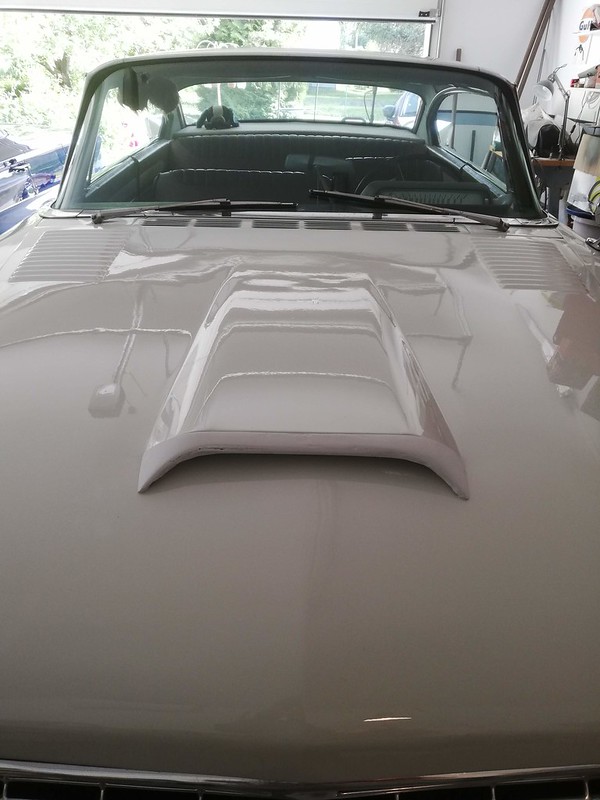
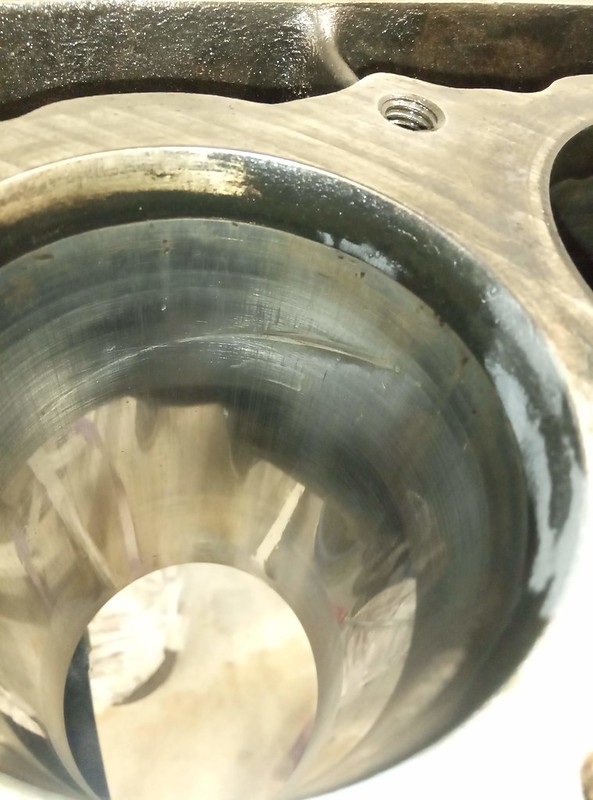
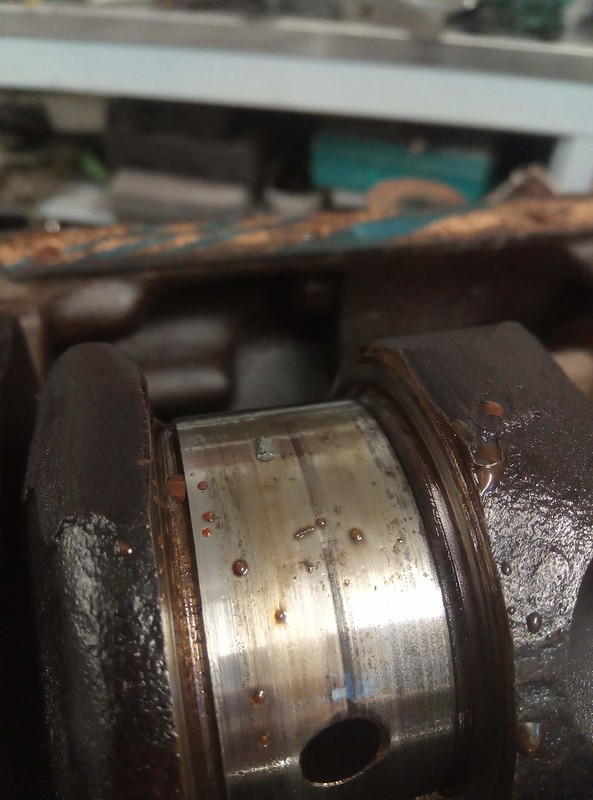
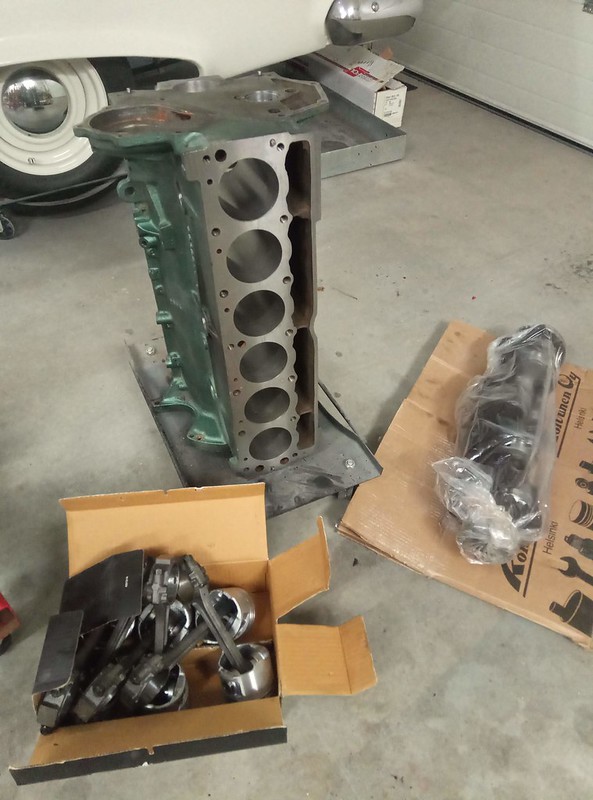
I have lots of stuff more to show you, if interested. The car is painted different now, hood has a mild scoop, the engine is teared down at the current moment and is at machine shop to be bored. New 2019 model Dutra Duals are waiting in the shelf and so on.

(Edit- Image resizing)

Author:  MJF [ Sun Mar 15, 2020 4:39 am ]
Post subject:  Re: Dodge Pioneer -61 225 Eaton M90

Interesting project indeed, I've been following at overdrive.fi from beginning :D

Author:  Charrlie_S [ Sun Mar 15, 2020 5:22 am ]
Post subject:  Re: Dodge Pioneer -61 225 Eaton M90

Looking good, keep it coming

Author:  Rob Simmons [ Sun Mar 15, 2020 6:40 am ]
Post subject:  Re: Dodge Pioneer -61 225 Eaton M90

Pure awesomeness!

Author:  Dart270 [ Sun Mar 15, 2020 8:13 am ]
Post subject:  Re: Dodge Pioneer -61 225 Eaton M90

Welcome to the site. Impressive work and nice car. You should have no trouble with stock internals and 5-7 psi, IF you can get a good spark advance curve and tune the air-fuel ratio properly. I have a boosted turbo Slant and EFI makes it a snap to tune. I think you will stay with the carb, so my best recommendation is to get an AFR gauge and use that for tuning.

Enjoy your wonderful project!

Lou

Author:  Markus-FIN [ Sun Mar 15, 2020 8:49 am ]
Post subject:  Re: Dodge Pioneer -61 225 Eaton M90

Thank you guys!
So maybe I show you some more then :D

The Power Plant

When I got the engine running, I was pretty excited about it. One thing I considered a must to do, was upgrading the old points ignition to electronic. And of course, the best answer for that found right here, at the Slantsix.org.

Image
I did the GM HEI - conversion and ordered the 4-pin HEI-unit and Mopar wiring harness from Summit. I had an old Mopar-ignition box that was broken and scraped it clean. HEI-unit is screwed under the transistor heat sink. If only I would have known then, that there is a 5-pin version with the ability to retard the timing 5 degrees. Well maybe I do it later, if I cant get my custom modded vacuum canister to work.

Image
Then I bench tested the system before installing it to the car. It worked beautifully and even gave a bright blue spark with a 0.100" gap in plug.

Image
Here it is, sticking thru the hood. I felt no regret doing this, as the hood was pretty shot anyway. Badly rusted and so on.

The Body

I know this forum is mostly about our engines, so I try to keep this part short and do a fast forward:mrgreen:

Image
For the scoop, I just used a piece of sheet metal, rounded the side edges and welded it in place. I tried to make it as small as possible and think how they would have done it in the factory. Don't know if I succeeded thought. This hood has some cool factory louvers by the way.


Image
This is how bad the hood was.

Image
The gas tank was shot, so I made my own. It feeled way too expensive to ship one at the time from US.

Image
Tank being welded together

Image
The rear suspension was missing one leaf both sides and they were sagging. I dismantled them, hammered some shape to them cold with an anvil and added one leaf. Installed them with urethane bushings. There were 2" lowering blocks also. I like stock stance way better than lowered.

Image
Here she is primered and ready for block sanding

Image
Shot the body in my garage with Chrysler W1, white. Photo taken last autumn. I had a weekend time to drive and test the combo before removing the engine and starting to clean up the engine compartment

Image
For the scoop, I'm planning to make some kind of trim, sand casting from aluminium and polishing it up. Here is one of my pattern ideas.

Image
Engine compartment after removing the engine. Photo taken somewhere around September 2019

Image
And here it is as today. All parts were dismantled and new bushings were installed. Frame and inner fenders all painted with POR-15.

To be continued...

Author:  Markus-FIN [ Sun Mar 15, 2020 9:42 am ]
Post subject:  Re: Dodge Pioneer -61 225 Eaton M90

The Current state of the Power Plant

Image
Before tearing the engine to pieces, I re-designed the bracket for belt tensioner. Tensioner here is from Dodge Caliber, and is a bit better looking than the first french model in my test combo. The new bracket also takes some of the weight off from intake studs.


Image
After disassembly I first thouht that a ring job would be enough. But the No5 cylinder had a deep horizontal scratch. Also the No5 piston was different from other pistons.

Image
Bearings were shot...

Image
... and crank journals were grooved.

Image
Camshaft was a bit worn, but the lifters were like cups.

Image
The head didn't look that bad. No1 cylinder obviously was running rich or had a leak from rings or valve stem. But I'm not going to be using this head anyway. I've got a later style head from a friend that has a valve job and resurfacing done few years back in a machine shop. It was installed to a motor but driven less than a 1000 miles due to a bad blow by.

Image
At the very moment block, crank and rods are at the machine shop. I got the new pistons few days back and delivered them to the shop. Block will be bored 0.030" over and all crank journals needs to be ground 0.010" undersize. Parts used for this build are stock Sealed Power parts, no nice performance stuff. I'm a bit concerned about the timing gears, especially the one for the camshaft. I've heard that these with tree large oval holes are the weak link, and could be broken at high RPM:s. But I'm not planning to do a high revving engine and planning to use it as it was first designed.

Image
I dissassembled the Eaton and stripped the coating from the rotors.

Image
Did some very mild porting job to the outlet. Mostly just rounding the sharp edges.

Image
Here is some polishing started to the inlet side of the sc.

Image
Also did a bit porting here. I removed the bridge between intake holes.

Image
Rare parts, that I actually had to buy. But they are so COOL. The new style Dutra's from Aussiespeed. I like the way how those outlets are facing. To the back at front manifold and to front at back manifold.

Image
Some extra gauges I'm planning to use with the car. Included is the AFR-gauge to help tuning and avoiding the thing go lean.


-Markus

Author:  hyper_pak [ Sun Mar 15, 2020 11:07 am ]
Post subject:  Re: Dodge Pioneer -61 225 Eaton M90

Very cool! You guys from Europe amaze me with your projects and craftsmanship! Add the distance from easy parts sources and difficulty in getting help with things we here in the states take for granted make your efforts all the more impressive. Thanks for sharing your progress.

Author:  Rick Covalt [ Sun Mar 15, 2020 4:16 pm ]
Post subject:  Re: Dodge Pioneer -61 225 Eaton M90

Yes great work! I like to see you do things yourself that no one else is doing, and make it look easy! :D :D Lots of good info! Keep the pics coming!! :D :D

Author:  oldwood [ Tue Mar 17, 2020 9:42 am ]
Post subject:  Re: Dodge Pioneer -61 225 Eaton M90

Hey from Arkansas. I just bought this 1 family owned '61 Seneca. /6, 3 onda tree. Luv your 2dr. I'm sorting out all the issues of mine since its been sitting since 1981. I found the original window sticker and build sheet to this car. Keep up the good work. Most of the guys on this forum don't drive these early model /6 cars.

Attachments:
031.JPG
031.JPG [ 120.66 KiB | Viewed 10394 times ]

Author:  Greg Ondayko [ Tue Mar 17, 2020 3:10 pm ]
Post subject:  Re: Dodge Pioneer -61 225 Eaton M90

I wish some of you euro guys would relocate here and show these Yankees some creativity.

Thanks for sharing!


Greg

Author:  Markus-FIN [ Sun Mar 22, 2020 10:58 am ]
Post subject:  Re: Dodge Pioneer -61 225 Eaton M90

Thanks for the compliments!

oldwood wrote:
Hey from Arkansas. I just bought this 1 family owned '61 Seneca. /6, 3 onda tree. Luv your 2dr. I'm sorting out all the issues of mine since its been sitting since 1981. I found the original window sticker and build sheet to this car. Keep up the good work. Most of the guys on this forum don't drive these early model /6 cars.

Nice pick! These are cool cars and gives a very comfort ride.


As my block and crank are in the machine shop right now, I'm a bit distracted about the project. The machine shop was booked out and busy for few weeks and they promised me the engine back somewhere around April. But the rising of this new virus may put a hold on some things.
.
But today, I quarantined myself to the garage and had a tiny little progress forward. Supercharger is put together again, with new rear bearings.
Bought the rear bearings from eBay and they were advertised as "Double Sealed". Description said: "It is a better choice if alternative fuels like Methanol injection are being used because the purpose of the double seal design is to keep liquids out of needle bearings."
However, I did not notice any difference between the old and new bearing. Although, my eyesight ain't what it used to be.

Image
I drilled and tapped a new hole to the intake manifold for a fitting. Above this hole, there is internal stock PCV- valve in the supercharger. Just going to run a hose from the fitting to valve cover.

Image
Also put some paint for few parts. Chrysler Turquoise from POR-15. Trying to aim for OE look under the hood.

Author:  Tim Keith [ Tue Mar 24, 2020 12:20 am ]
Post subject:  Re: Dodge Pioneer -61 225 Eaton M90

Wow! You are talented

Author:  jcc [ Wed Mar 25, 2020 2:05 pm ]
Post subject:  Re: Dodge Pioneer -61 225 Eaton M90

The OP has an abundance of spunk as I see it.

spunk
noun
1.
INFORMAL
courage and determination.

Author:  Markus-FIN [ Sun Apr 12, 2020 9:49 am ]
Post subject:  Re: Dodge Pioneer -61 225 Eaton M90

I had the block back from the machine shop week ago and slowly started to putting it back together.
Also looked inside the trans pan and noted a good amount of friction material gum in there. So I ordered a master kit and Transgo shift kit for the trans too.
The problem with the old style trans is the low oil pan and the early style filter is no longer available. Luckily I had an old Jeep RE42-trans lying around. It has the deep pan and it's direct fit for the A904. It's probably going to be a good idea to build the trans anyway, as the power levels might be a bit higher than stock. And I believe that this trans has not been builded since it left the assembly line.

Image
Block right out of the machine shop

Image
It's a good idea to check everything thoroughly, before the assembly.
Don't know how this was done, but did not look very professional to me. #1 Cam bearing here and I filed it clean.
Everything else checked ok


Image
First glance with the piston and rod assembly and immediately I felt sick as the pistons were pushed in 180 degree wrong way.
Except that, they werent. The 1960-63 Slants had the connection rod squirt hole pointing to the drivers side. And thanks for
this forum, I know it now too.


Image
Thanks to the Dutra's new Slant book, I remembered to file the #1 main bearing for oil delivery to the timing gear and chain.

Image
Crank and pistons are assembled. Gapped the rings a little bigger.

And then to the head...
I'm no master at porting cylinder heads, but thought that I could make them at least a little better.

Image
Gasket shows that some material needs to be removed from the ports

Image
From the exhaust side, I took the most material out. Cleaned them a bit and ground the valve guide ramp a little smoother.

Image
Valve seats had been replaced by the heads previous onwner. Blended the ports a bit to match the seat.

Image
Did some homebrew quick back facing to the valves. Also a light lapping was done.

Image
And then some paint, and the head is done.

Now I'm waiting for the cam and lifter kit to arrive from US. I went with the stock replacement cam as I thought it would serve it's purpose well in all around comfort driver. There's now urge to go crazy with the power, just a little "oomph" is enough for me. Well at least for now...

Page 1 of 5 All times are UTC-07:00
Powered by phpBB® Forum Software © phpBB Limited
https://www.phpbb.com/