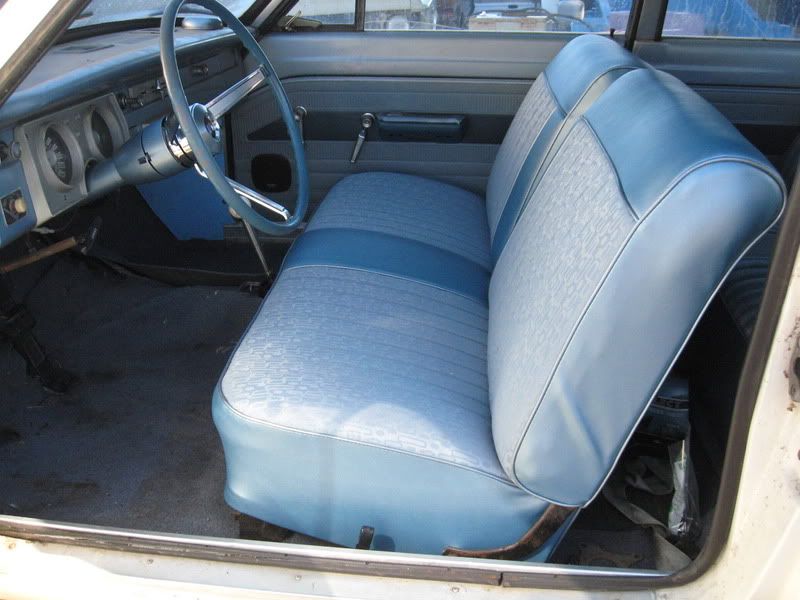
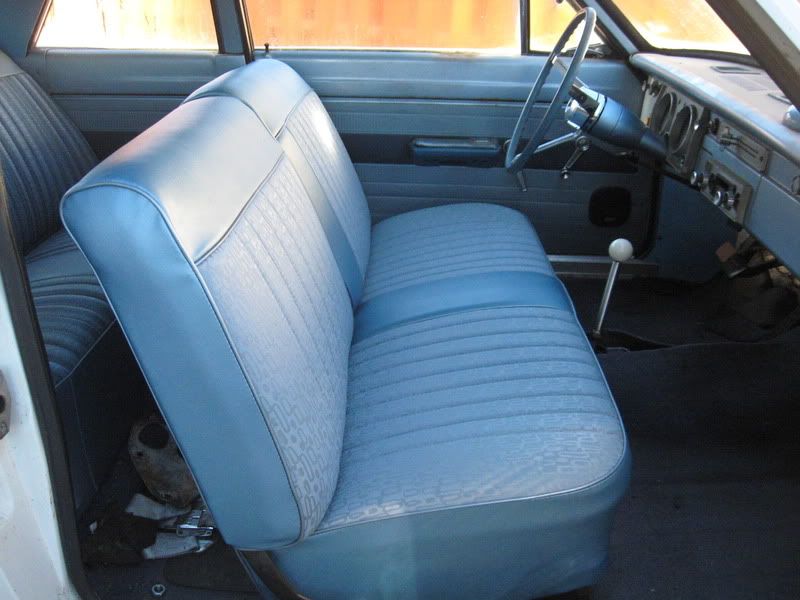
Finally got the seat back form the upholstery shop. I went with a groovy 60's looking fabric for the cloth insert. Looks like the shifter will interfere with moving the seat fwd far enough for D to be able to drive Scooter w/o cushion behind her.

| Slant Six Forum https://slantsix.org/forum/ |
|
| ntsqd's Valiant https://slantsix.org/forum/viewtopic.php?t=49591 |
Page 2 of 9 |
| Author: | ntsqd [ Sat Oct 27, 2012 2:36 pm ] |
| Post subject: | |
Thanks Lou! Matt, I think that the seat will *just* clear when SWMBO wants to drive Scooter. And she does want to drive it. Still haven't heard anything from the upholsterer. Been working on the exhaust system. Have a plan and the parts, but this warm weather and short evenings makes it difficult to get much done. I have from the manifold to just about the rear of the front seat built. Need to build a hanger next before preceding down to the SS muffler that M/T donated. |
|
| Author: | ntsqd [ Thu Dec 27, 2012 2:59 pm ] |
| Post subject: | |
Finally got the seat back form the upholstery shop. I went with a groovy 60's looking fabric for the cloth insert. Looks like the shifter will interfere with moving the seat fwd far enough for D to be able to drive Scooter w/o cushion behind her.
|
|
| Author: | bigall [ Fri Dec 28, 2012 9:09 pm ] |
| Post subject: | |
Those seats look real COOOLL. |
|
| Author: | ntsqd [ Mon Feb 11, 2013 6:12 am ] |
| Post subject: | |
Got a start on the exhaust. It is flanged along the way so that it can easily be removed in sections or even changed if need be. 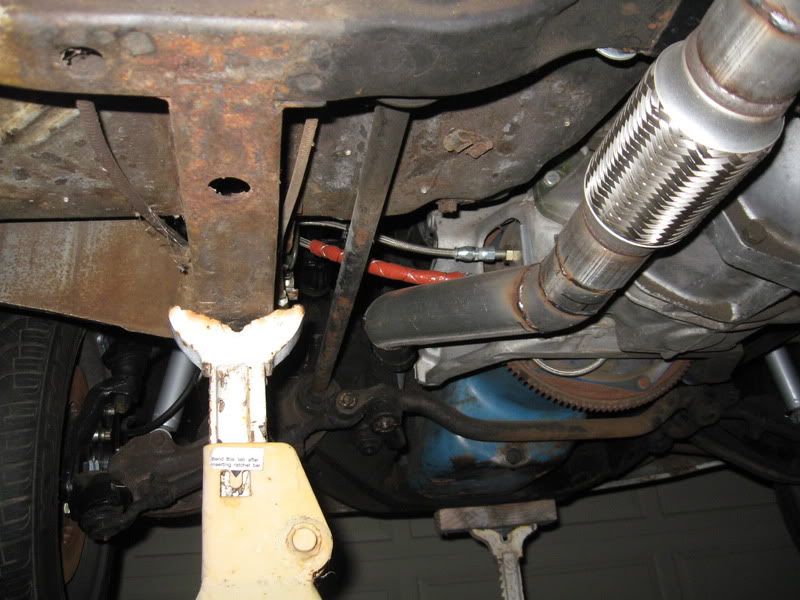 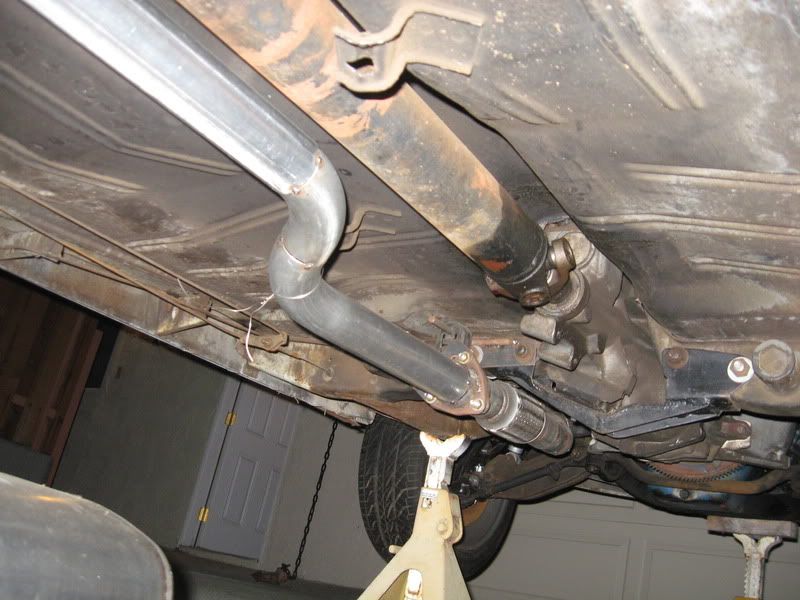 Decided that I wanted an Anza/Monza tip for the exhaust, but was appalled at the pricing for new. The donated SS muffler had a resonator in its attached plumbing so I started with it and a SS mandrel bend. After I've fitted it I'll make the "baloney cut" on the tips. Forming the resonator outlet to the merged twin tips:  Mostly finished resonator tip: 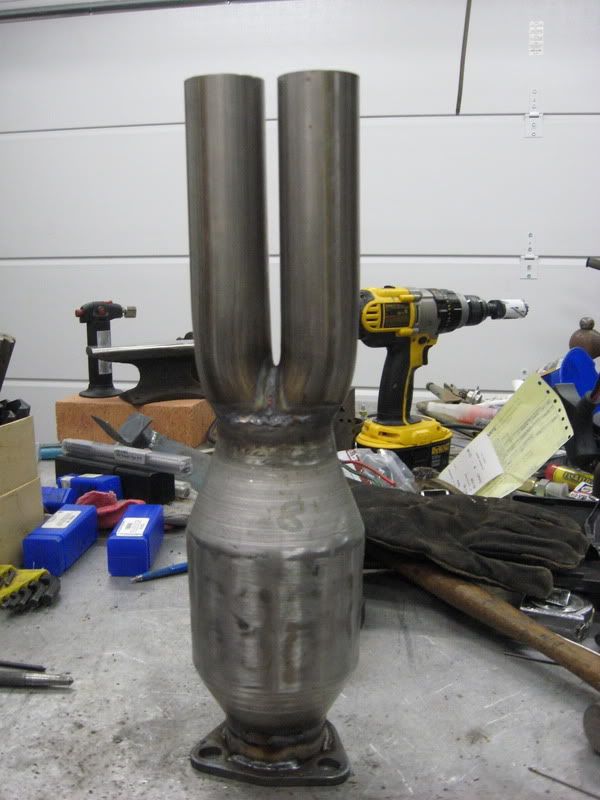
|
|
| Author: | ntsqd [ Sun Mar 10, 2013 10:17 am ] |
| Post subject: | |
Got the exhaust nearly done, one hanger remaining to be completed. Painted the pieces with black bbq paint. I've used this in the past on exhaust systems with reasonable results.   The tip hangs lower than it will because the rear-most hanger not being made yet. The tips will clear the valance panel by about 3/4" once the hanger is in place.  It sounds really nice. Not loud or drone-y, but has a nice, mellow rumble at idle. |
|
| Author: | ntsqd [ Sat Mar 23, 2013 2:59 pm ] |
| Post subject: | YeeeHaaaaa!!!! |
I drove Scooter! Took a couple tentative short hops near the neighborhood Thursday eve and Friday eve. Alignment is out of whack and my friend who can do the work can't get to it until next Saturday. Then this morning I unexpectedly needed some bits from West Marine, about 7 miles away. I could have buttoned the CTD back together enough to drive, but I decided since Scooter was on the street that I'd take it. Worked up to fwy speed slowly and all was good so I let 'er rip! Gearing is a bit short, top end is compromised some but even in 5th it pulls pretty hard if you floor it. Off-idle to lower mid-range is wonky. The OE 1 bbl carb just doesn't want to do small throttle plate angles there. I have parts coming from McMaster to build a cable throttle system, but those won't be here until Monday. Once I've got the pedal converted to cable I can put the small Holley 2 bbl on the aftermarket intake. EDIT: Found a vacuum leak and that the screw/bolt that holds the timing tab to the bottom of the dizzy has worked loose enough to full-float the timing by 10°-15° Fixed the leak, but it looks like the dizzy might need a new o-ring so I'll wait until Monday eve to pull out the dizzy. |
|
| Author: | Dart270 [ Sun Mar 24, 2013 6:48 am ] |
| Post subject: | |
Congrats! Enjoy the drive and the tuning. Great car you have there. Lou |
|
| Author: | ntsqd [ Mon Mar 25, 2013 3:01 pm ] |
| Post subject: | |
Thanks Lou. I keep finding excuses to drive it even though I know that it still needs a few things sorted out. This being my first \ I'm rather surprised by its ability to accelerate while already in 5th going highway speeds, even with the OE 1 bbl carb. I guess that I've been driving similar HP trucks with large tires too long... Some other initial observations; with the KYB's on it and with the front ride height set to center the 195/50R15 fronts in the wheel wells I'm not seeing much need for a sway bar. Perhaps that will change once I'm able to really push it into a corner, but I don't expect that any future bar will need to be all that stiff. |
|
| Author: | ntsqd [ Mon Oct 28, 2013 9:31 am ] |
| Post subject: | |
Way, way past time for some updates. Built a cable throttle system with a compression return spring arrangement. Used 3/32" SS cable and a pulley from mcmaster-carr, with cable housing left over from using an FJ62 cable throttle. Built the pulley bracket to replace the original under-dash linkage bracket and drilled the pulley for the cable binding screw and the ball stud for the pedal linkage to attach to.    The original fuel tank had a huge dent in it and in looking on Rock Auto I noticed that they offer a pick-up/sender with a return in it for fuel injection. My plan is to adapt a 2.8L GM V6 TBI system to this engine. The first step of that process is to build the fuel supply system. Since I won't immediately be going to EFI I have a by-passing regulator (visible in the background of the first jpg) to step it down to pressures that the carb can deal with. |
|
| Author: | ntsqd [ Tue Dec 03, 2013 10:27 am ] |
| Post subject: | |
A month ago or so while I was working on the fuel system in advance of going to a TBI I noticed a rust stain going down and to the right on the bell-housing. Previously I had done a coolant system pressure check and while it did leak down, it took a very long time for it to do so. I guess now I know where the leak was. So I kept an eye on the stain and never could catch it wet, but it was getting bigger and I was losing coolant so I knew that I had to do something. Yesterday I pulled it all apart. The head gasket is firmly bonded to both the head and the block, but it would appear that the steel core rusted out causing a leakage path thru the HG itself. It must have been very temperature dependent since I never did see the stain wet regardless of when I checked it. Pics of the FPR and the fuel pump installed, note the oil pressure switch for the fuel pump and the OE oil pressure gauge sender remote mounted in the background:  
|
|
| Author: | ntsqd [ Thu Dec 19, 2013 9:12 am ] |
| Post subject: | |
Note the bend in the hose in the above picture. In use the pump pulled enough of a vacuum on the hose that it semi-kinked at the bend. I've since replaced that hose assembly with an assembly that has a 45° hose end on one end. The kink didn't completely close off the hose and I suspect that the engine would have pulled right to redline, whatever that is. However that would've worked the pump really hard and probably have caused it to fail prematurely. I'm trying to tidy up the passenger side of the engine. With the electric pump I no longer need the mechanical pump unless I dry-sump the carb. I'd really rather move to the TBI, so to make it less tempting I removed the pump and since I didn't have the right length bolts but do have some B-7 all-thread and some flanged nuts I made a block-off plate & mounting studs. The studs are long enough that they will work with the pump should it need to go back on. Still need a tidy mounting arrangement for the coil.  After talking to my local starter/generator/alternator guy I decided to use the 90A Bosch alt off my old '67 Ranchero instead of trying to find an higher amperage stock Chrysler alt off a luxoboat of some sort. The mounting foot of the Bosch alt has an ID of almost 11mm so I was able to make the bracket such that the alt sits on a hollow pin that is part of the bracket rather than merely being clamped on the ends by the thru-bolt or stud. I was able to reuse the OE tensioner bracket by drilling a second mounting hole in it. Time will tell, the other end is very close to the air filter can and I may need to shorten the tensioner a little. The new alt's output wire goes straight to the battery and I jumpered the two screw terminals in the wire bulkhead together. The OE ammeter won't work now, but it shouldn't fry either. The new drive belt is almost a foot shorter in length, which I see being a good thing. The steering box is clean because it now has been rebuilt with a 20:1 worm in it. I find it odd that you can't buy an original style pitman shaft bushings anywhere. I finally found a bushing that was very close to the same dims as the original part at mcmaster-carr, but in an alloy intended for high impact applications. I also added a grease zerk to the box casting between the two lower bushings as I don't see how grease would ever get to the lowest bushing. I don't understand the desire for needle bearings. They do not have anywhere near the same supporting surface area.    One last thing; The steel core in the head gasket rusted out. I suspect that the cause was its sitting for a very long time with only water in the coolant jacket, but I really don't know for sure. I started noticing a rust stain on the top of the bell-housing. I never, ever saw it wet, but it was getting bigger. On pulling the head both surfaces had gasket material firmly stuck to them in the area of concern, which supports my hypothesis, but the gasket did not separate right at the steel core. Which I would have expected if I were correct. In any case the head is back on after getting a small tune-up of a valve job (all but 3 of the valves leaked to varying degrees) and being cut .025" Based on the workmanship observed in the head the machinist was hesitant to really lean on the short block for fear of hurting it. "Never hot-rod an unknown or poor condition engine." Given how surprisingly hard the engine ran like it was I'm really interested to see what it will do now. First I have to get the dad-blanged manifold studs to seal and not pull the threads in the head..... |
|
| Author: | ntsqd [ Tue Jan 28, 2014 1:33 pm ] |
| Post subject: | |
Latest is that I finally have a working heater!!! Bent up some 5/8" SST tubing and made a simple support for them near the engine end. Not sure that I like all of the visual confusion going on with the tubes near the firewall. Once the TBI system is in place the Holley regulator and pressure gauge will be gone, so I plan to re-evaluate then.  BTW, does anyone read this any more, or am I just talking to myself? |
|
| Author: | emsvitil [ Tue Jan 28, 2014 1:45 pm ] |
| Post subject: | |
Quote: Latest is that I finally have a working heater!!!
BTW, does anyone read this any more, or am I just talking to myself? We don't read, we just look at the pictures........ |
|
| Author: | sandy in BC [ Tue Jan 28, 2014 2:21 pm ] |
| Post subject: | |
I look at the pictures and sound out some of the words.... |
|
| Author: | ntsqd [ Tue Jan 28, 2014 2:35 pm ] |
| Post subject: | |
OK, as long someone is getting something out of this. I'll try not to use words that are too big and obfuscating. |
|
| Page 2 of 9 | All times are UTC-07:00 |
| Powered by phpBB® Forum Software © phpBB Limited https://www.phpbb.com/ |
|