Slant Six Forum https://slantsix.org/forum/ |
|
68 Dart Project And Turbo Slant6 https://slantsix.org/forum/viewtopic.php?t=54478 |
Page 2 of 4 |
Author: | 6inarow-makemego [ Fri Mar 28, 2014 9:03 pm ] |
Post subject: | |
Looks great, another great /6 to make people say "cool." |
Author: | Serj22 [ Tue Apr 01, 2014 8:16 pm ] |
Post subject: | |
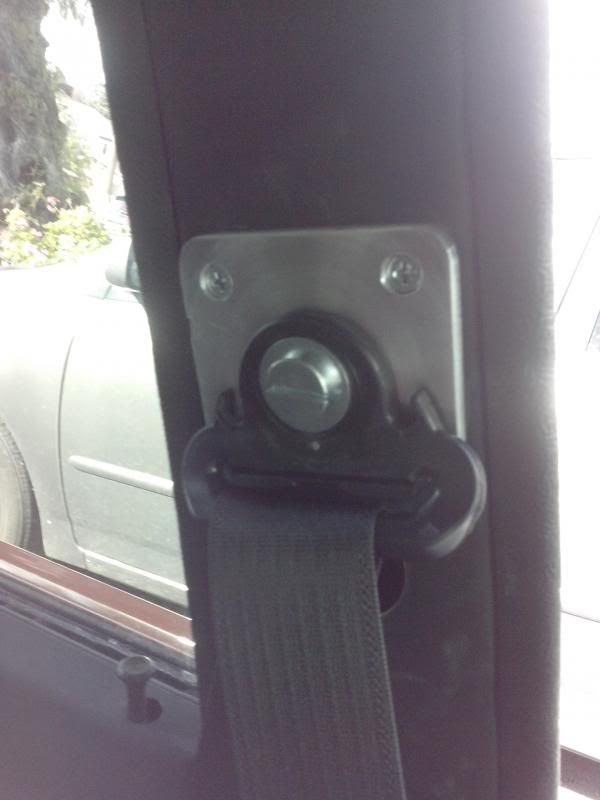
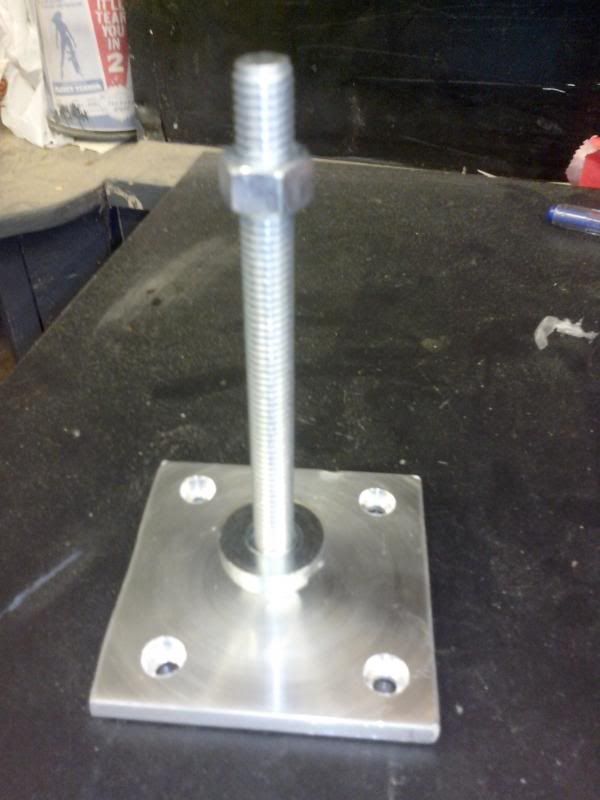
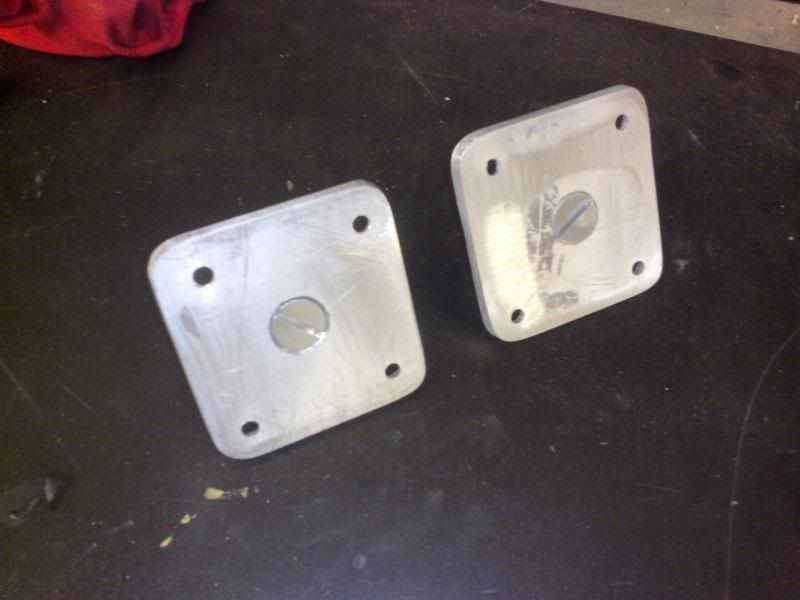
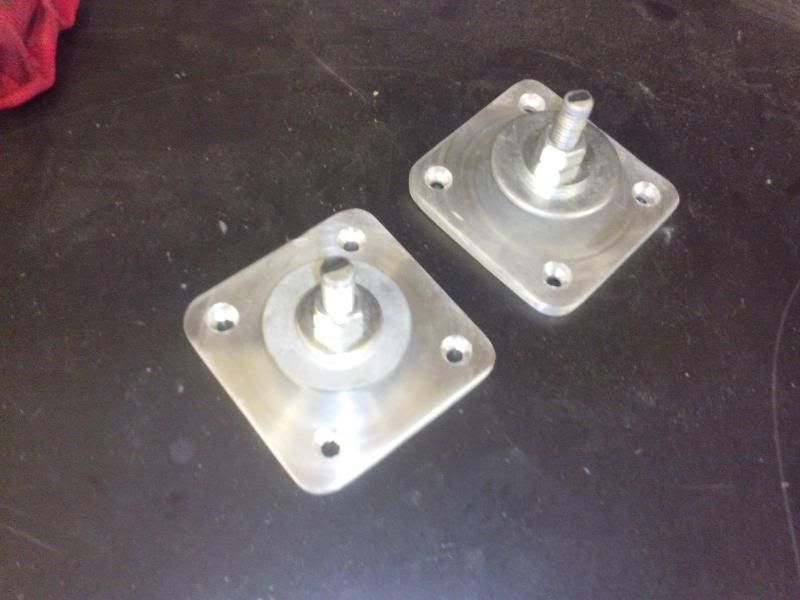
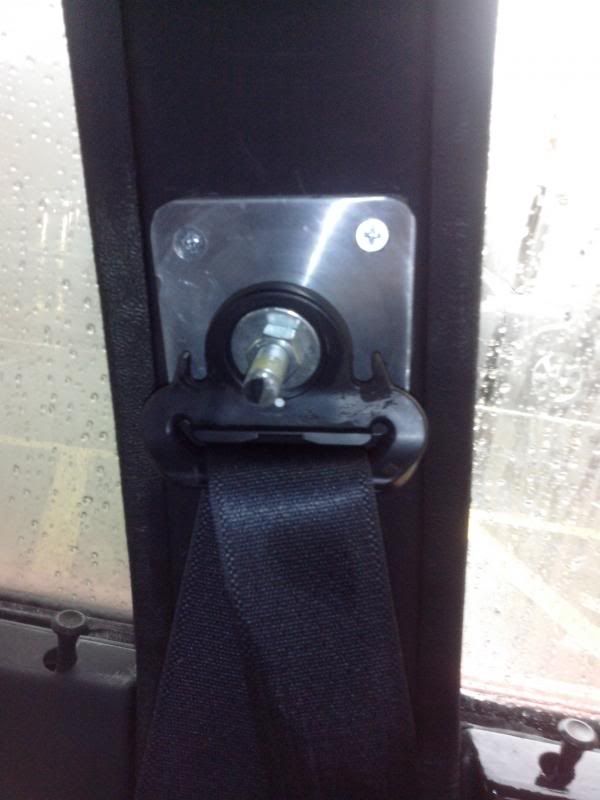
Today I made some new seat belt shoulder brackets to replace my old system, which was coming undone slowly as you drove. That's bad. So it needed an overhaul. The new mount I made involves a plate, a solid threaded bolt, and washers. I started with simple 1/4" aluminum stock, which I cut down to 3"x3" with a cutting wheel (not exactly machine-shop quality). I drilled 4 holes - one in each corner, and counter sunk them with a larger drill bit to allow the screw head to sit in. In the center I drilled a 1/2" hole, and on the back of the hole, counter sunk it so that the bolt head would sit flush with the back. I used the same bit, undid the clamp, and spun the brackets face down on the table with the drill to make a round pattern that looks like a brushed aluminum piece, and it looks cool. I did it on accident on the first piece, and repeated it on the second. I put a 1/2" bolt on there, and then used a nut and secured it against the face. I took the washer out of the mix that you see in that image so it is just the nut resting on the aluminum. I do similar on brackets when I am working on wood rollercoasters, so I'd assume it will hold this in place too and be good without the washer. It also looks better. This is the back of each, not cleaned up very good, but I sanded them after this. This shows how the bolts sit on the back. I rounded the edges with a belt sander and made it look a little better. They look ok. The big washer was just a placeholder for where the shoudler piece goes. After I get the system worked out better, I'm going to cut the bolt excess off and maybe find a finish nut for it. It's a little rough, but still a work in progress. I used 4 heavy sheet metal screws to attach it. I think eventually I'll do rivets, as that's what some old car conversion kits use, but don't have any long enough to reach. The screws are real solid. I went to the other side of the car and yanked on the seatbelt as hard as I could a bunch. It still caught every single time, the cam stopped like it's supposed to, and the bracket did not move, or become loose. Next is to cut off the excess when it stops raining, and find a cleaner looking nut to finish it better. |
Author: | kesteb [ Tue Apr 01, 2014 11:33 pm ] |
Post subject: | |
That is not a good way to mount that bracket. One violent stop and those sheet metal screws with pop out of the pillar. You should but that bracket inside of the pillar. That would make a nice solid mount. |
Author: | Serj22 [ Wed Apr 02, 2014 6:05 am ] |
Post subject: | |
I haven't figured a way to get it inside the pillar, besides cutting the outer pillar off and putting it inside, then putting the pillar back. This is the same system I've seen on conversion kits, but they say to use rivets. Would a rivet be any better? Seeing as they expand out on the back? |
Author: | curmudgeon [ Wed Apr 02, 2014 9:30 am ] |
Post subject: | |
Try this: http://www.wescoperformance.com/retrofi ... -door.html |
Author: | Serj22 [ Wed Apr 02, 2014 2:17 pm ] |
Post subject: | |
That's the idea I went off of, but didn't notice the plate on the back slid up through a 1 1/2 inch huge hole. I'll think on it more, but that may be the only way to get the back on behind the sheet metal. I can make some small 1" plates to go behind. Good call guys. |
Author: | Serj22 [ Wed Apr 02, 2014 6:01 pm ] |
Post subject: | |
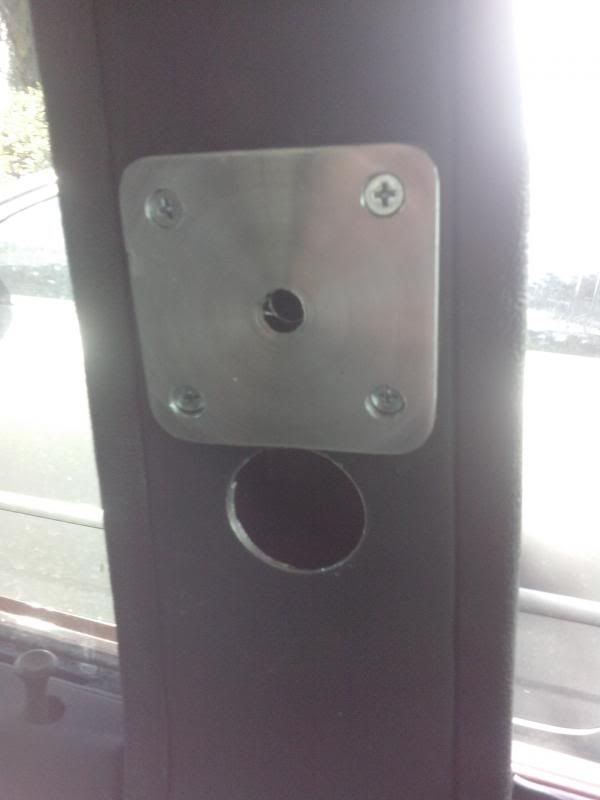
Well. It was painful. I reengineered the brackets. I have a large 1 1/2" hole drilled right beneath them now. I'll have to hunt down a plastic cover for those. But I was able to get a nut set on the back so it can't back out, and a plate behind the sheet metal about 1 1/4 inch wide with a standard and lock washer on top. That's about the same as the other side. I lost one cutout into the drivers side pillar. I'll probably hear that rattle eventually. Pics to follow. |
Author: | Serj22 [ Wed Apr 02, 2014 8:05 pm ] |
Post subject: | |
That's right before I matched the hole in the center. Making that large hole felt bad, but it's worth it. That's the only way to really get to the back of the bracket sans cutting the outside of the pillar off. I'll find a nice plastic or rubber pop-in cover for it. But for now the seatbelt covers it pretty well. Maybe it's an opportunity to add some kind of lighting, or a tweeter... but that would be pretty close to my head. |
Author: | Serj22 [ Thu Apr 03, 2014 6:54 pm ] |
Post subject: | |
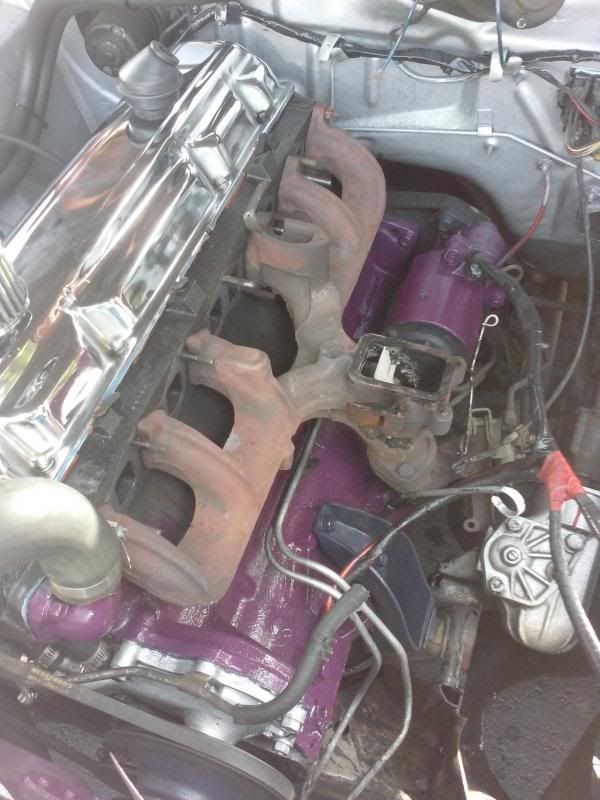
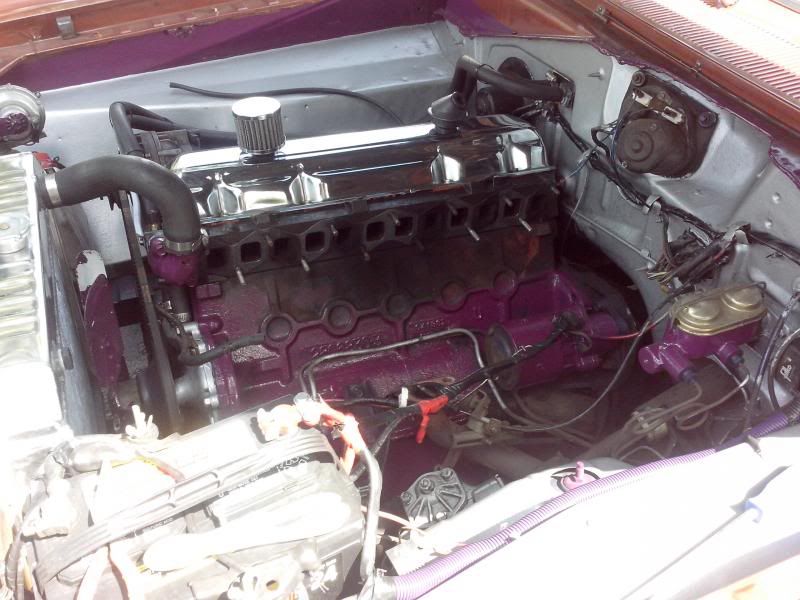
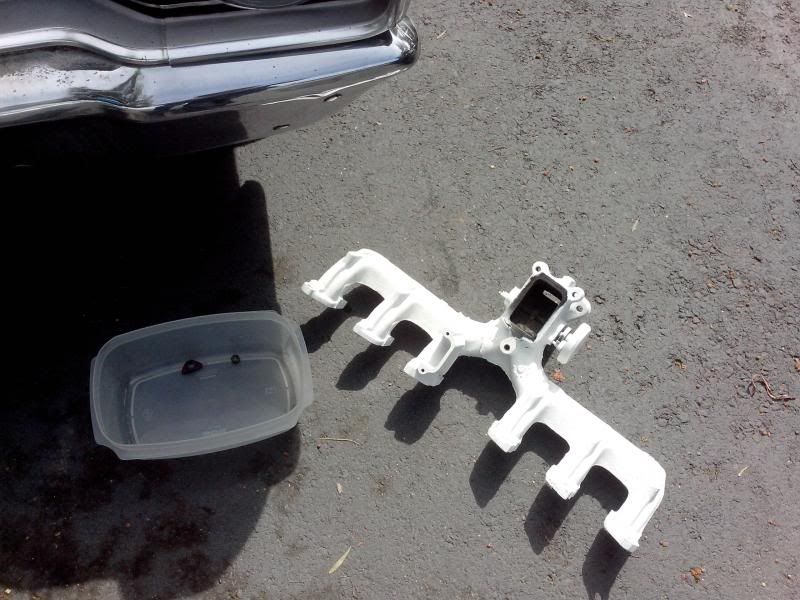
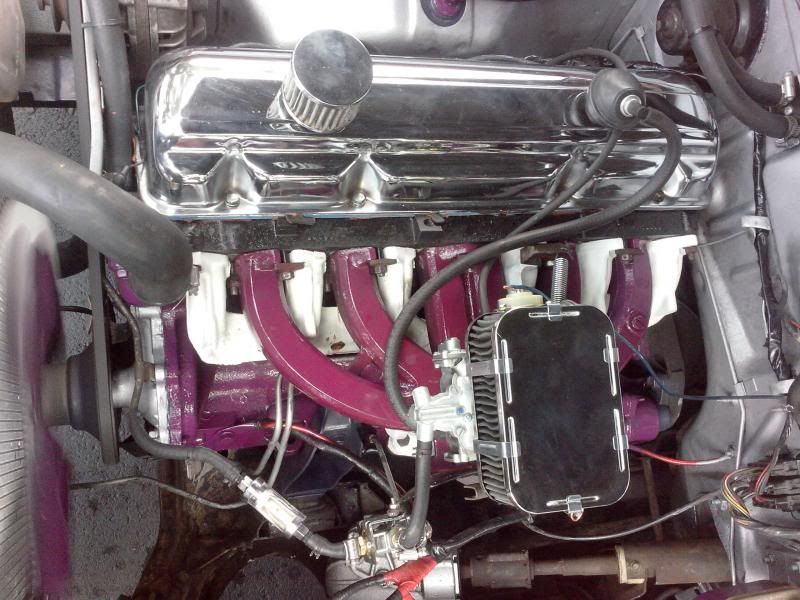
I put my other exhaust manifold on today. A couple of the old runners on the last manifold didn't quite make contact with the gasket on the head and as such they leaked a bit. It always sounded like an airplane under the hood. Now it's quiet. The white baked on coating didn't hold up perfectly the first run and dissolved a bit. It seems stable now. I followed the dirtections exactly on the can which involved baking it twice it in an oven. A couple spots got messy looking when I ran it. Oh well. I had to clean up some of the black from the leak on the block too. |
Author: | newpoppop [ Sun Apr 13, 2014 5:04 pm ] |
Post subject: | your dart |
Looks cool. keep up the good work... |
Author: | Serj22 [ Thu Apr 17, 2014 8:12 pm ] |
Post subject: | |
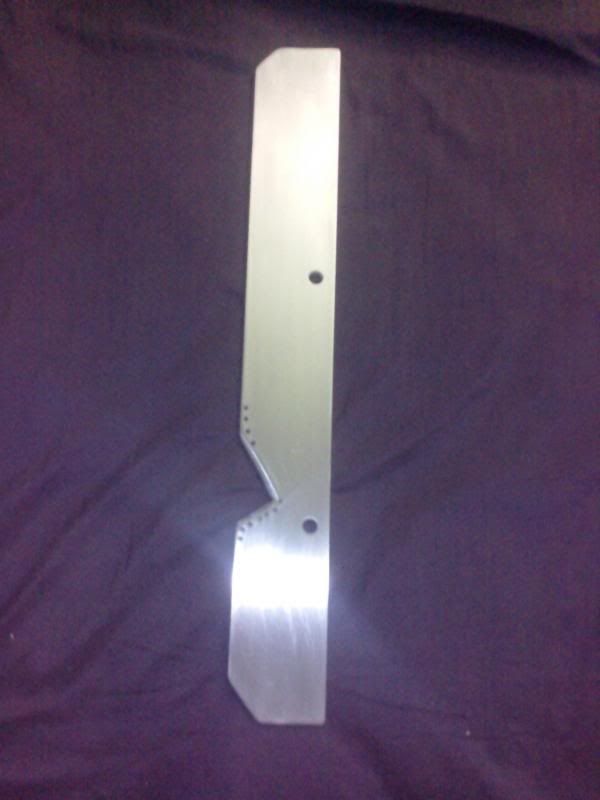
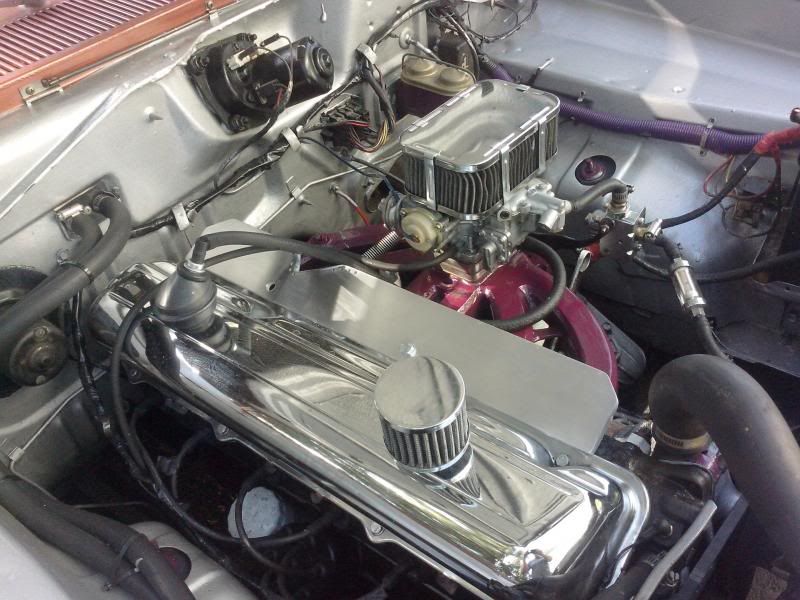
This is my next little project. I'm making a homemade - er - I don't know? I didn't like the way the exhaust manifold looked, and it started to be flaky looking once the VHT melted off, so I cut up some 3" wide aluminum to make what I am calling the "shadow plate" for now - till I think of something else to call it. It covers up the last 1" or so of the head that protrudes from the side of the valve cover and utilizes the two hook bolt points on top of the head to mount via 2x 3/8(16) bolts. It will also have the PCV and vacuum hoses pass through individual grommets somewhere along the plate, so they can run back then across the valve cover and look kind of clean. It also incorporates multiple locations to mount a return spring so I can make something cleaner than the original return bracket bent over... This is just cleaned up with some 320 sandpaper, I'll finish it out with 800 or something and then polish it up. It serves no real purpose, but looks interesting I think. Test fit - with just one bolt in place. I'm debating where I want the PCV and vacuum to pass through - they won't be draped over the spring as they are in the photo, that was just to get them out of the way. |
Author: | 6inarow-makemego [ Fri Apr 18, 2014 3:28 am ] |
Post subject: | |
Great project, I appreciate the details and enjoy reading your thread. |
Author: | Serj22 [ Fri May 09, 2014 6:43 pm ] |
Post subject: | |
Tsss... Tsss... http://www.youtube.com/watch?v=kBO8hHEHVDQ Been working on this on board compressor for a while. It keeps me from having to pull into a gas station to change the pressure for raising the rear end (for a fun day or whatever) and dropping it back down to comfortable ride height. I have a 12v solenoid routed under the hood to purge pressure, a gauge on the driver's kick panel to monitor it, and the compressor is behind the driver's side tail light in the trunk. The fill for the jacks is also located in the trunk. It keeps everything pretty much out of sight. And a short video of the purple hard bangin six, and that quiet... too quiet glasspack exhaust... http://www.youtube.com/watch?v=IWL823eRcuY |
Page 2 of 4 | All times are UTC-08:00 |
Powered by phpBB® Forum Software © phpBB Limited https://www.phpbb.com/ |