Slant Six Forum
https://slantsix.org/forum/

1964 Dart Grüne Hölle Road Course AutoX Car IRWIN PA
https://slantsix.org/forum/viewtopic.php?t=60536
Page 29 of 35

Author:  Greg Ondayko [ Fri Jul 01, 2022 8:08 pm ]
Post subject:  7/1/22

7/1/22:

Been Busy lately Driving and running some errands, finally got back to doing some maintenance and replacing broken stuff or upgrading other things..

I took a 900 Mile trip one way to Pick up some Slant 6 Parts, meetup with friends and explore part of the country that I have yet to experience thoroughly. I took my copilot along for 4 days of camping, and road tripping in a car with no A/C or Radio, and Virtually no screens. For me it was epic.

For this Trip It would Take us to the Midwest, I had My Mostly empty ValianTrailer (with the Needed Camping Gear.) and My Copilot.
The Route Would Take us Through 3 Major Population Centers: - Columbus OH, Indianapolis, IN, and Saint Louis, MO.
I timed the Driving so that I was mostly driving at Night and At the Campsites During the day. - It worked well with The Camgrounds Allowing us Some Early Check ins as needed.

First Leg of the Drive was from Pittsburgh Metro to Terre Haute, IN.
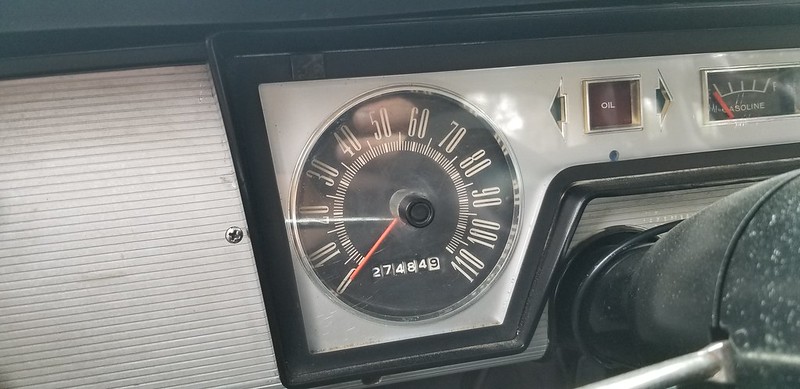
Starting Mileage on the Odometer:
Image
The Copilot was Awake by our First Fuel Stop Outside Columbus, OH..
Image

I Like this Exit Just over the OH/IN State line for a quick Respite before getting into the Indianapolis Metro / I465 Beltway.
Image

A total Traffic Stopage on I465West at 06:30 took us around the Southern Metro Indy Area Before Finding I70 West again.
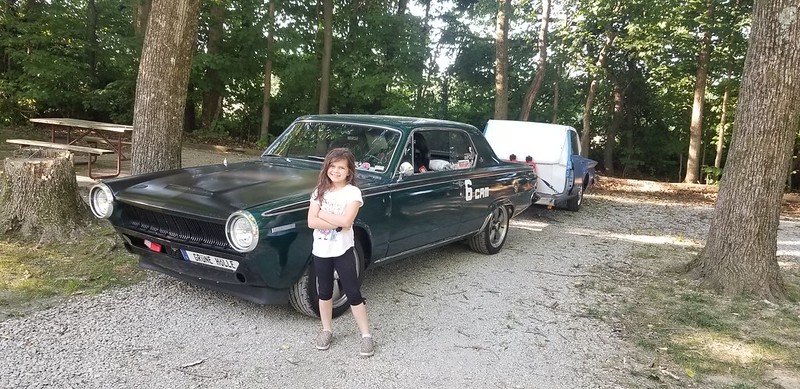
We Made it to Terre Haute and found our campsite by 09:00
Image

Fire up the Griddle, Make some Pancakes, then Naptime for me whilst the copilot finds the pool and playground and feeds the donkeys.
Image
Image

We Hit the Road again Early The Next day and Made it Through Saint Louis before Most humans are awake and Driving. Helps that We were still on eastern time as well!

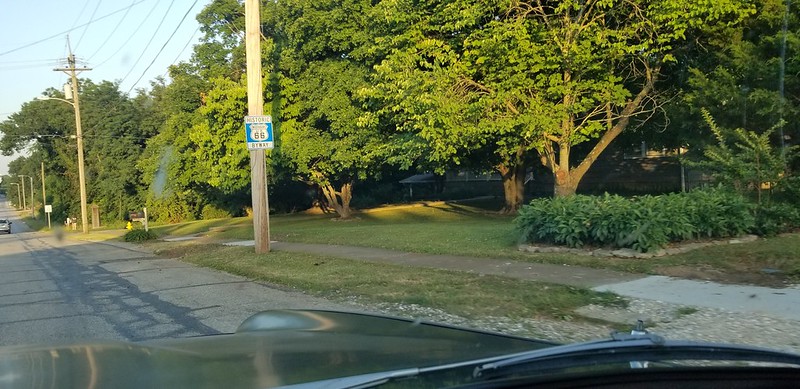
Stopped off for some Breakfast and Fuel, and the Historic Route 66 Signs were Calling, But Alas, A few more hours of interstates before Driving on some of the "Mother Road".
Image

Had Never Been through the Ozarks... Reminded me a bit of Home, just less windy in general.
Image

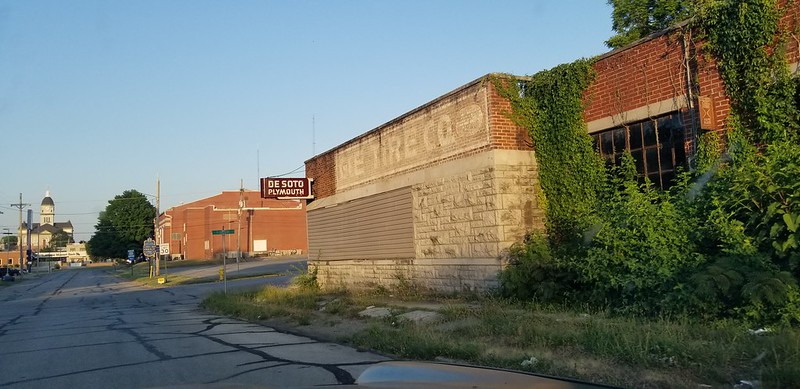
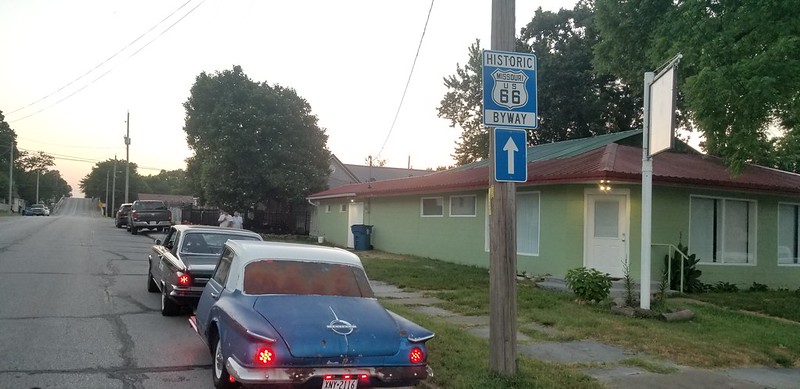
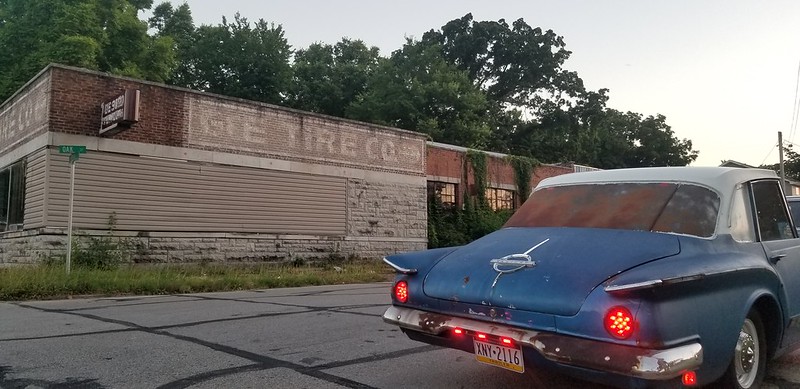
Finally Historic Route 66:
Image

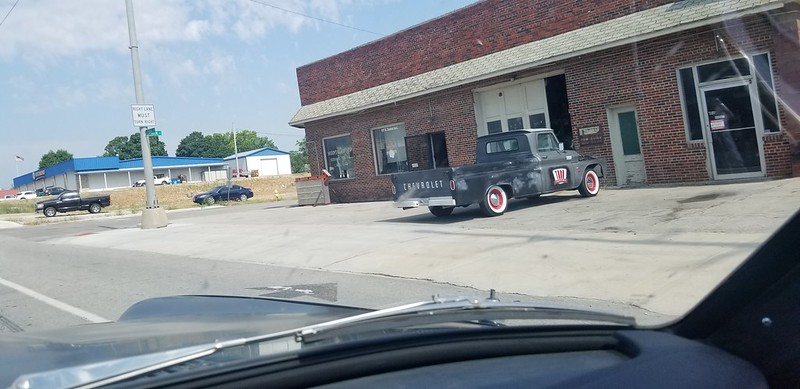
Cool Stuff is found near the population centers.
Image
Image

Metup with my Buddy, Swapped parts and stories, and began to head back home.... but not without taking in some of the local culture and glamour shots.
Image
Image
Image
Image
Image

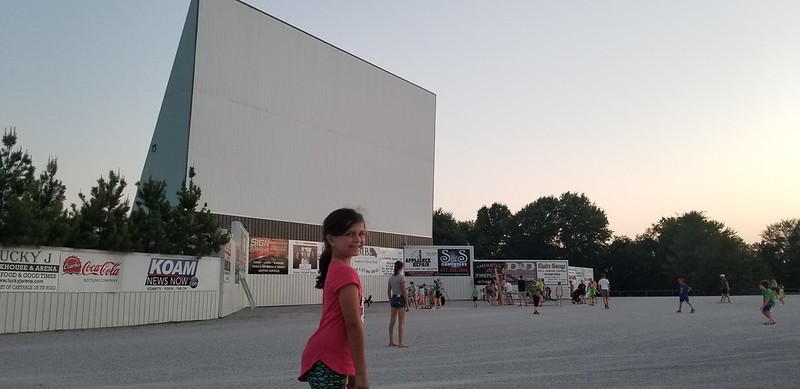
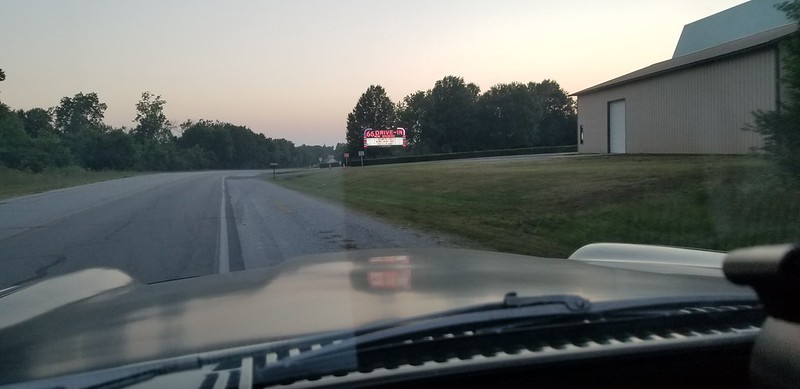
Well I guess I lied a bit... we did see one screen - the silver screen before leaving town... I mean it's on the National Register of Historic Places.. So I recommend you check out a Movie there someday as well.
Image
Image
Image

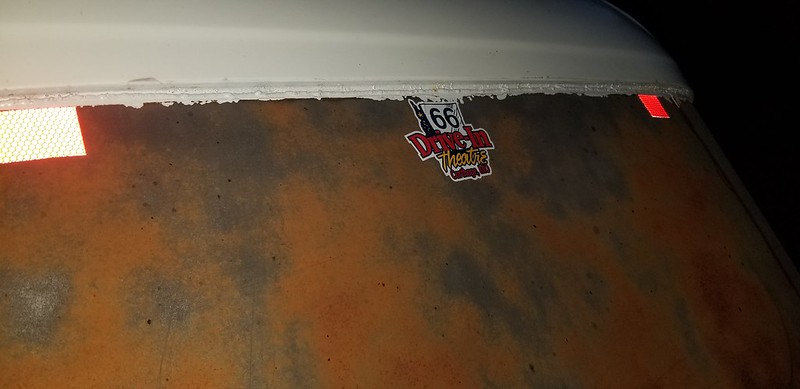
Got a Sticker..
Image
Image

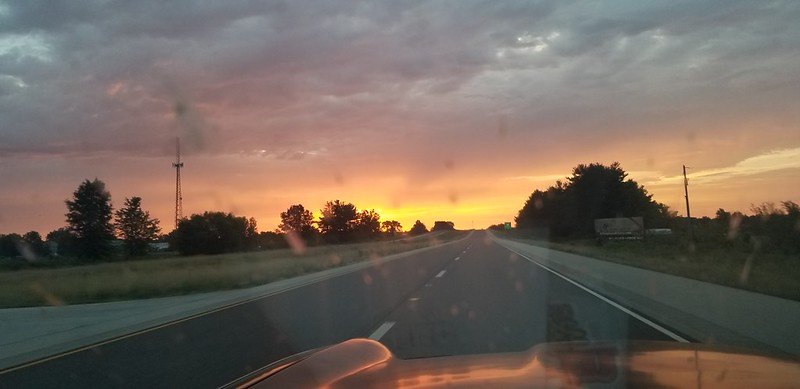
On The way Back - Daybreak somewhere on I70 in Illinois
Image

Before Hitting our Last Campground on the East Side Of the Indianapolis Beltway.. It was a bit Buggy....
Image
Image

Checked in and setup.. Ready to Nap the day away.
Image

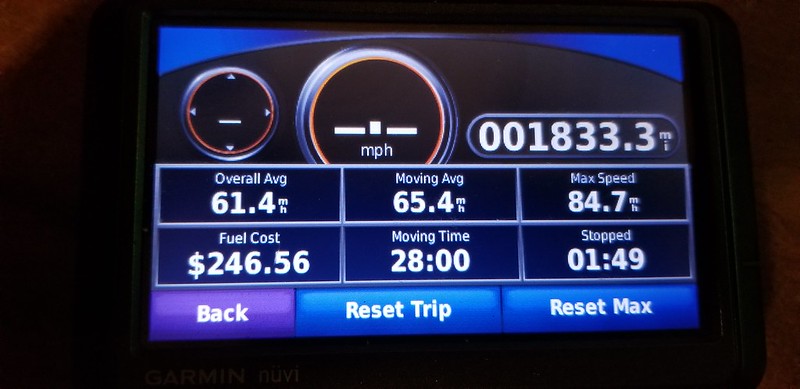
odometer and GPS Do not match.. Speedo Is Correct when riving however.
Image

A Fun 28 Hours of Driving in four days..
Image

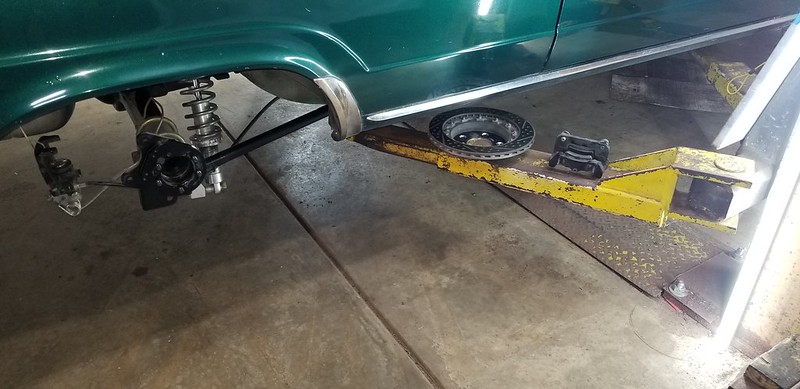
The Car developed a bearing Noise in the Axle during the Trip... the Right Rear was all hoopajooped.. Got new parts on the way.
Image

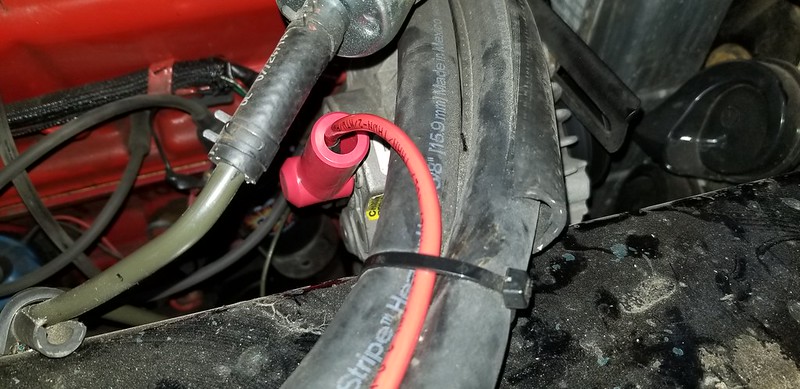
Upgraded the Alternator Charging Wire to 8Ga and Bypassed the Factory Firewall Bulkhead connection and Ammeter.
Image
Image
Image

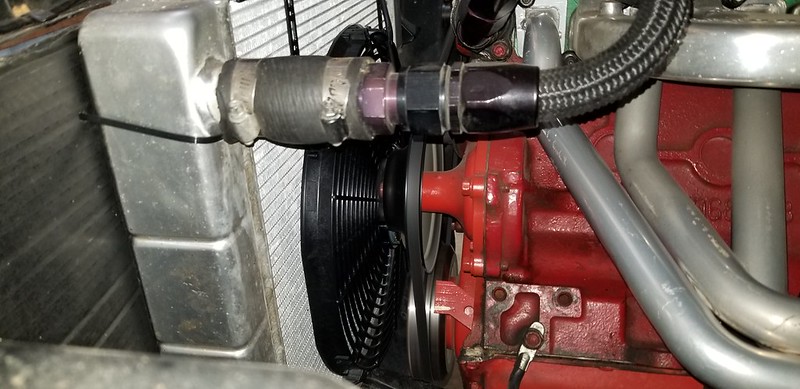
Also Added a SPAL 16" Fan and Removed the OE 4 Blade Mechanical Fan - Hoping that on a Hot summer day when the car is idling and not moving in traffic that it will not get too hot and bothered.
Image
Image


Will be back on the Road Soon for More adventures this summer - Carlisle, PVGP, and maybe a TNiA or a Local autoX
(I really need to get the fuel spill out of the filler cap solved before the Track or Cone events.) - it's on the to-to list.

Author:  slantzilla [ Sat Jul 02, 2022 6:28 pm ]
Post subject:  Re: 1964 Dart Grüne Hölle Road Course AutoX Car IRWIN PA

I have seen a movie at the historic RT 66 Drive-in.

Author:  Greg Ondayko [ Sun Jul 03, 2022 2:30 am ]
Post subject:  Re: 1964 Dart Grüne Hölle Road Course AutoX Car IRWIN PA

Quote:
I have seen a movie at the historic RT 66 Drive-in.
Awesome. It's a good place to go and a fun way to experience some authentic US history.

Author:  Dart270 [ Sun Jul 03, 2022 3:54 am ]
Post subject:  Re: 1964 Dart Grüne Hölle Road Course AutoX Car IRWIN PA

Greg,

Thanks a bunch for sharing your lovely trip with us. I wonder if we could do a tandem trip sometime, me with a similar Copilot (Liz)??

I tried to stop by that same drive-in theater in 2018, also in a 1964 Dart. Unfortunately, an antelope near Rawlins, WY crushed my plans for that. Maybe someday...
Slant on,
Lou

Author:  Greg Ondayko [ Sun Jul 03, 2022 10:48 am ]
Post subject:  Re: 1964 Dart Grüne Hölle Road Course AutoX Car IRWIN PA

Quote:
Greg,

Thanks a bunch for sharing your lovely trip with us. I wonder if we could do a tandem trip sometime, me with a similar Copilot (Liz)??

I tried to stop by that same drive-in theater in 2018, also in a 1964 Dart. Unfortunately, an antelope near Rawlins, WY crushed my plans for that. Maybe someday...

Slant on,
Lou
No Problem thanks for checking out the documentation.

Let's Plan on it.

Be cautious for that Wildlife.. I was Lucky... No Wildlife interactions.. :D


Greg

Author:  Greg Ondayko [ Mon Jul 04, 2022 2:26 pm ]
Post subject:  7/4/22

7/4/22:

Happy Birthday USA.

I got the Axle Bearing in the mail yesterday - I got it Pressed on and Lubed up, I Decided it replace the Outer Axle Seal as it had a Funny Wear Pattern on the Seal.... and The bearing Had to come off to replace the seal anyway.

I got the Axle slammed back home and Filled with 2 Quarts of Axle Juice.
Image
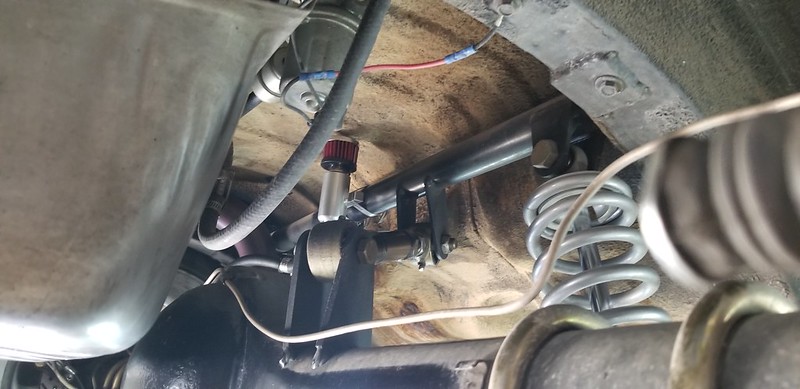
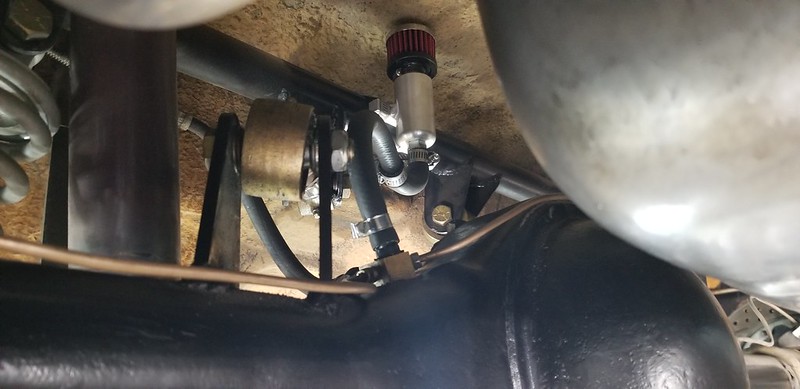
Got a Proper Filtered Vent for the Axle Juice installed - Hopefully it will keep the axle a bit cleaner under there.
Image
Image

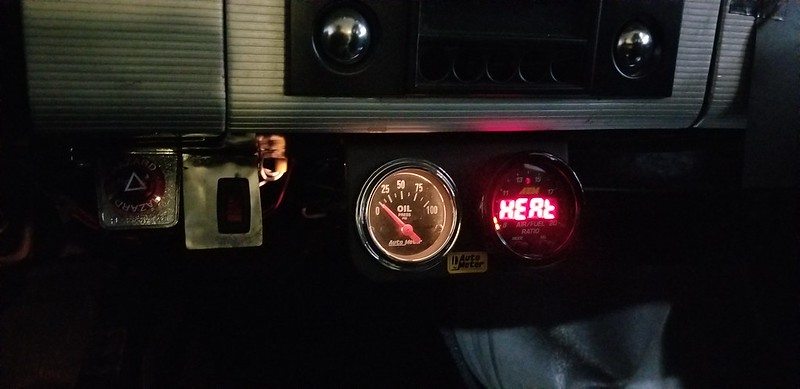
I got to Replace My Old Autometer Analog Oil Gauge With An AEM one -

Before:
Image

After:
Image
Image
Image

I still have other Stuff on my List of make the car suck less, but trips and other events and projects are beginning to eat away into my " work on this car time"
None of it is critical, just elective cases... I get to it sometime..
- Install New Steering Box
- Install New / Better Motor mounts
- Replace one of the headlight Frames that is cracked.
- Upgrade the Gauge Pod Below the dash to a 3 Holer.. and Add an AEM Voltmeter.
- I am sure there are other things too, Just can't think of them now

Author:  Dart270 [ Tue Jul 05, 2022 7:13 am ]
Post subject:  Re: 1964 Dart Grüne Hölle Road Course AutoX Car IRWIN PA

Sounds good, Greg. What happened with the steering box? Wear or too much effort or?

Lou

Author:  Greg Ondayko [ Tue Jul 05, 2022 3:19 pm ]
Post subject:  Re: 1964 Dart Grüne Hölle Road Course AutoX Car IRWIN PA

Quote:
Sounds good, Greg. What happened with the steering box? Wear or too much effort or?

Lou
Wear I Guess- It should remain tight after say ~6000 miles but it's Loopy in the Center Too Much Play.

I got a Proper Firm Feel 16:1 Box this time. The Lares / Rockauto / PST Box is okay but I just want it to be better. So that used 16:1 Box may end up in one of the other Valiants or in the '69 Dart (all currently have 24:1 manual or Factory Power steering.

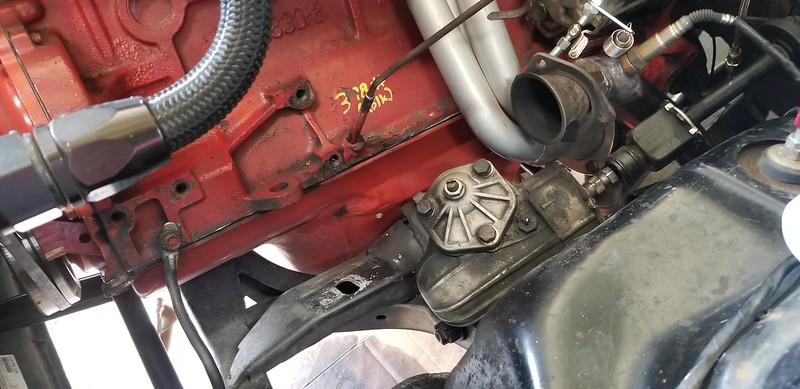
I have to Pull the Front Header to Extract the box, so It's a half Day Job to do it properly and Not Mess Stuff up.
The Guy who Built the exhaust made it difficult to access the Header collector Bolts ... so We'll see when I can get to it.

Greg

Author:  Dart270 [ Wed Jul 06, 2022 7:11 am ]
Post subject:  Re: 1964 Dart Grüne Hölle Road Course AutoX Car IRWIN PA

OK, good to know. Car is looking great. Sorry to hear about the futzin' needed, but that's how these things usually go!

Lou

Author:  Greg Ondayko [ Mon Aug 08, 2022 11:58 am ]
Post subject:  Re: 1964 Dart Grüne Hölle Road Course AutoX Car IRWIN PA

8/8/22:

Car is out of commission for a while as I was Not happy with clutch actuation / pedal feel while I had the car at Carlisle in the middle of last month.

I returned from Carlisle (180 Miles from me) and took the interstate so that I could just put the thing in 5th gear and not use the clutch pedal for the better part of a 3 hour drive.

I made it home successfully without the use tow truck or a flatbed.

I first suspected a Linkage /Z Bar failure beginning to happen.
Took all of those apart inspected everything, Fork arm, Linkages, Z bar etc. Could Not find anything amiss, so I reinforced the Body /Frame Rail Ball Stud Pivot.

Put it all back together and adjusted up the clutch - It was worse!!..This is crazy, so the Transmission had to come out for some inspection.
My next suspicion was a broken Input Bearing retainer /TOB Support -Known to break on the T-5's
I ordered up a steel one.

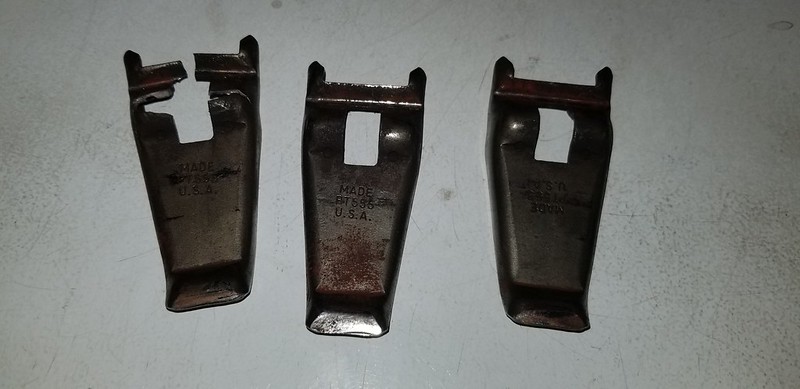
Got the trans pulled out and found the culprit to be a broken finger on the Pressure Plate.
I will rebuild the Pressure Plate myself. I have about 7 Core /Stockish 9 1/4" Borg and Beck Slant 6 Pressure Plates in stock from various cars and Projects.
I wanted to keep the pressure of this one and found some interesting variations, which I will share elsewhere.

Broken Clutch Fingers do not allow shifting to occur: :shock: :( :(
Image
Image

Also found Stress Cracks on the other 2 fingers: :( :( :shock:
Image

Hot Rodders seem to keep parts around for that time of need..
Image

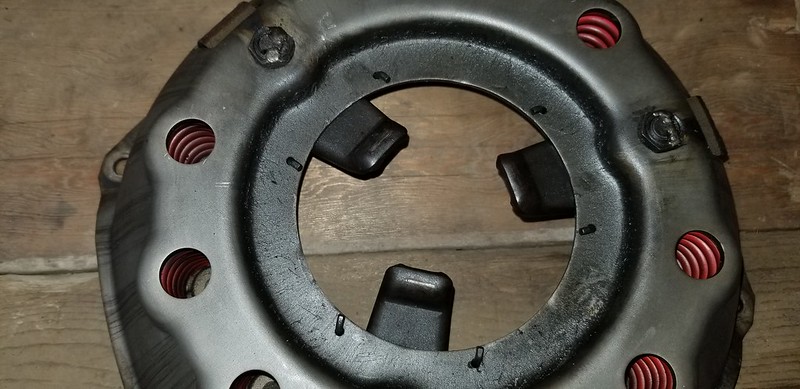
Found that some Borg&Beck PP's have Solid Fingers, while others are slotted:
Image
Image

The one I am working with had the Spring Pressures and Other Trick Parts setup By McLeod Back in the Day. This would be a long gone Part #/ Application that would be difficult to get again, Since the ownership Change in 2008.

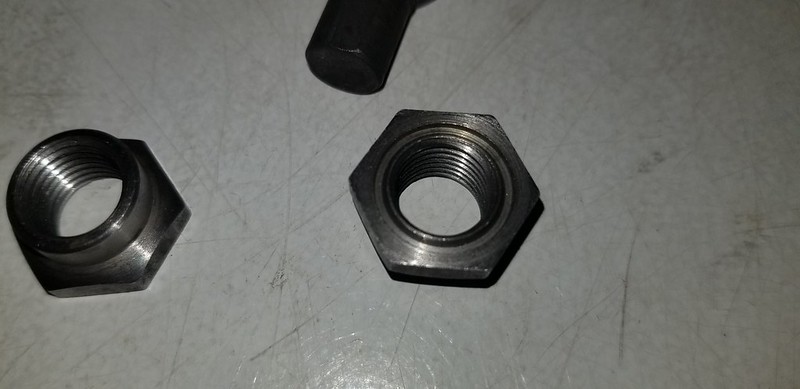
I found that the Pressure Ring is thicker than the stock replacement PP as well as utilizing Larger 7/16"-20 Clutch Eye Bolts (like in the V8 Borg & Beck Pressure Plate) vs the Standard 9 1/4" Pressure Plate which uses 3/8" eyebolts and Nuts to set finger height.

3/8" eyebolts on the Left, whilst 7/16" eyebolts on the right.
Image

The ones I had to take out were pretty crunchy as the rebuilder had welded the fingers to the adjustment net to keep the finger heights from changing, like this:
Image

So I had to really Grind a bunch of material off to get the nuts loose to disassemble the pressure plate from the cage.
Usually they are peened over to keep the adjustment, But I suppose that cann come loose over time.
Image

I called Kentucky Clutch and they had spares of the 7/16"-20 Eyebolts and Nuts (shared with V-8's) to sell me. - The 3/8" ones are no longer in production, from what the gentleman on the phone had told me.

The Larger 7/16"-20 Eybolts and lever height adjustment nuts can also be found on the Slant 6 10" Pressure Plates - Listed for the Truck Application.
Image

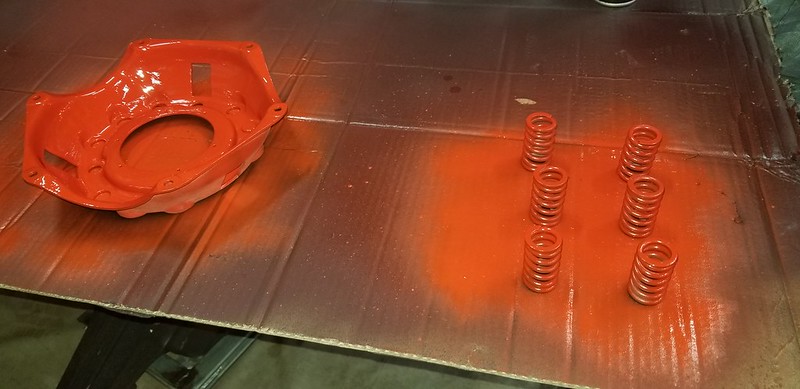
Getting things cleaned up while I am waiting on the Parts to arrive:
Image


Greg

Author:  Dart270 [ Mon Aug 08, 2022 1:06 pm ]
Post subject:  Re: 1964 Dart Grüne Hölle Road Course AutoX Car IRWIN PA

Thanks for the great rundown, Greg. Good to know I haven't saved that partially burnt 10" PP for nothin'.

Lou

Author:  Rick Covalt [ Mon Aug 08, 2022 1:56 pm ]
Post subject:  Re: 1964 Dart Grüne Hölle Road Course AutoX Car IRWIN PA

Any reason not to go with a Diaphragm type PP. ?

Author:  Greg Ondayko [ Mon Aug 08, 2022 2:30 pm ]
Post subject:  Re: 1964 Dart Grüne Hölle Road Course AutoX Car IRWIN PA

Quote:
Any reason not to go with a Diaphragm type PP. ?

Not really. I just have this one here in stock and ready to go in 2 days.

I would hafta get the flywheel drilled for another style of pp if I wanted use another one. I love the super light AL Flywheel that I have in there now.

Author:  Rick Covalt [ Mon Aug 08, 2022 4:44 pm ]
Post subject:  Re: 1964 Dart Grüne Hölle Road Course AutoX Car IRWIN PA

Quick, easy and in stock! A good combination! :D :D

Author:  Greg Ondayko [ Tue Aug 16, 2022 7:37 pm ]
Post subject:  8/16/22

8/16/22:

Last Week the Clutch Eyebolts Arrived in 2 days From Kentucky Clutch:
Image
Image
I hand Surfaced the Pressure Ring with a Diamond Stone as it was Not wrecked enough After say 8000 miles to warrant sending out to be blanchard ground.

The parts allowed me to put the pressure plate all back together, hopefully the Fingers will not fatigue, or crack etc. (fingers crossed) if It happens again I have one of the "Spec" Brand Fiero diaphragm Pressure Plates to try next, as they are a direct bolt in / replacement for a 9" slant 6 Borg and Beck Finger / Spring Style Pressure Plate.

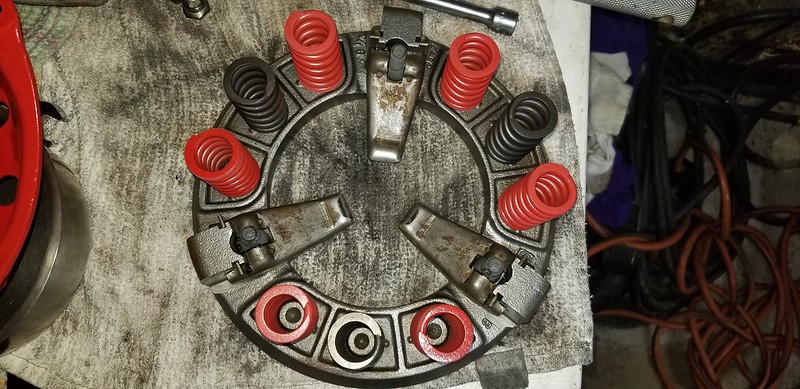
Pressure Plate Reassembly:
Image
Image
Image
Image

Every gearhead's household basement should have a 20 Ton Press next to the water heater, makes those pesky bearing and seal jobs at 1AM oh so convenient. :D :D
Image
Push it all together with a somewhat close to proper thickness clutch disc, set the finger height, lock down or weld the nuts for the clutch eyebolts... call it good to go.
Image

While I had the Pressure Plate and clutch disc removed from the flywheel I found the input bearing adapter to have dislodged from the back of the crank - I knew It was a light Press fit, but it was too light.
Fortunately It did not do any real damage, just was not supporting the input shaft correctly and was running against the clutch disc. I put it back in the proper place and used some Red Loctite 242 to hopefully hold it in place properly.

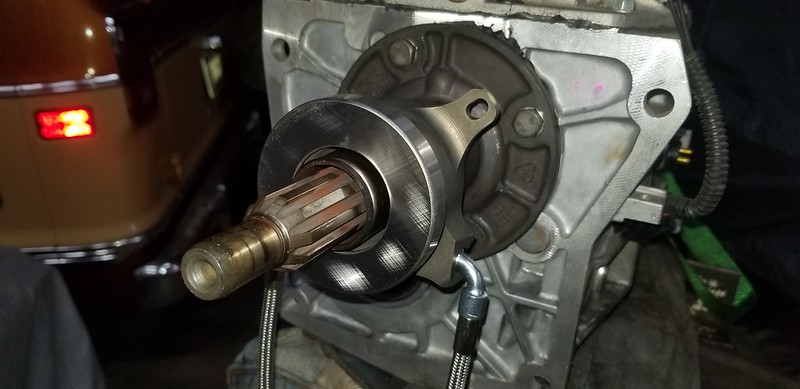
I figured this was a good time to make the switch to a hydraulic throwout bearing and get rid of the bulky clutch linkage, Z bar, clutch fork and other associated rods. I had already spent some considerable time reengineering the linkage and reinforcing the Z bar and other parts of the linkage to make it Skookum as Frig, but I was unhappy with how much flex there was in the dash with the clutch pedal pressed down, hopefully this will be better.

Because the Transmission is T5/Ford Parts are readily available and ubiquitous.. Not Something I am accustomed to with Slant 6's and Early Non B/E Body Mopars.
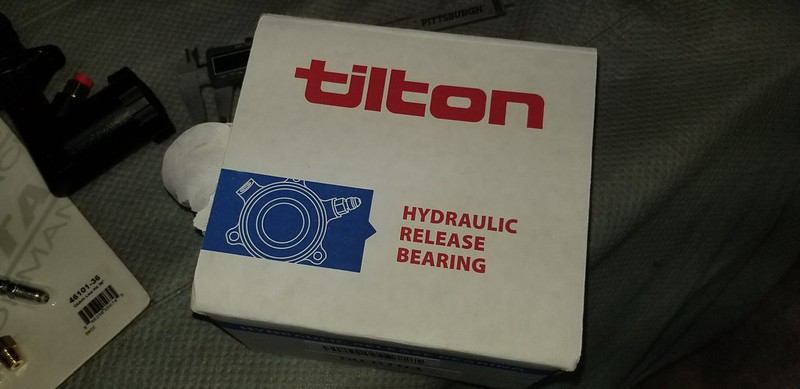
Hydraulic TOB - I used A Tilton 60-6104 - Literature says it's for a Diaphragm Pressure Plate, But it seems to work fine with the 3 Finger one as well. It has a little "finger stick" that replaces one of the input bearing retainer bolts.. this stick is used to keep the bearing body from spinning, some of the hydro TOB's I investigated just used the supply and feed lines for the anti rotation. - This method seemed like a better engineered idea to me.
Image
Image
Image
Image

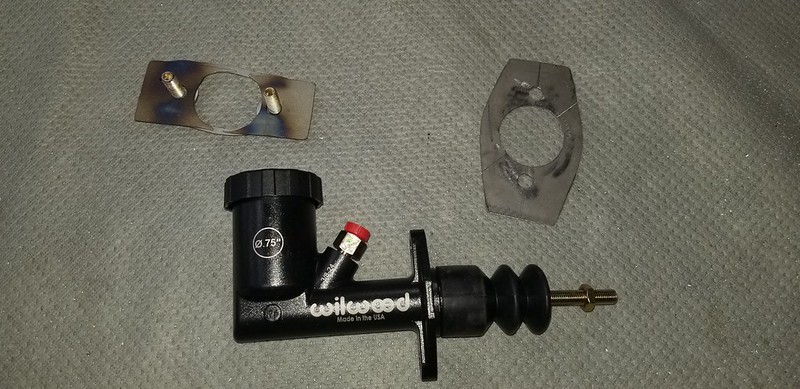
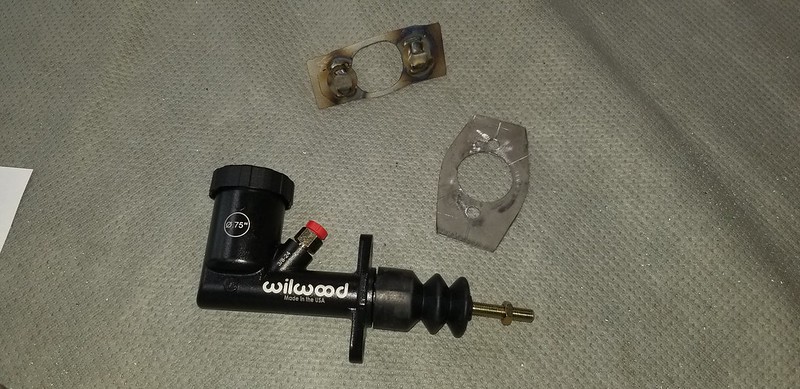
I am actuating it with a Wilwood GS Compact Master Cylinder 260-15098. They make these in a variety of bore sizes and intergal as well as remote reservoir versions.
Image
Made up some quick mounts and firewall reinforcement plates from scrap metal.
Image

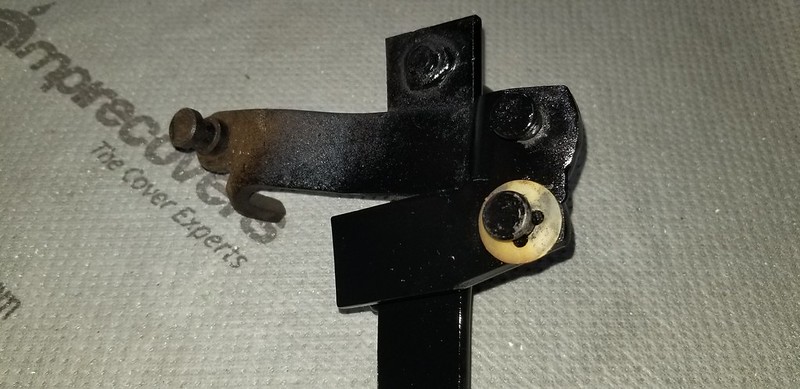
To get somewhat decent geometry to actuate the new clutch master I welded another actuator "nub" on the clutch pedal below the original one. If I ever need to revert back to the linkage and rod system I could do so without much trouble.
Image
Image

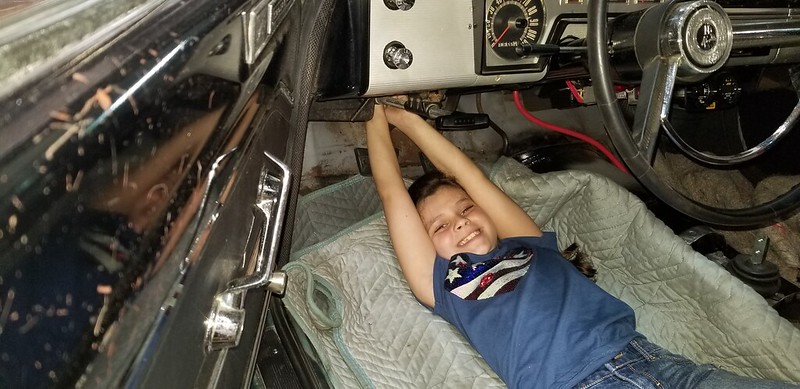
I had a helper at the shop help with a bit of the install.
Image

Done, with a pedal stop added on the floor.
Image

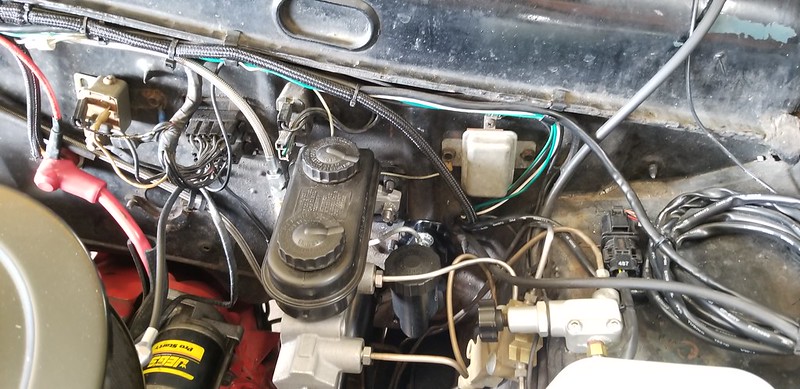
Clutch cylinder tucks in nicely next to the brake master, with just enough room to spin the cap off for fluid checks and fill.
Image
Image


Since I had the Car on the Lift and the Trans out to Rebuild the Pressure Plate, I also Accomplished a few other things on my to do list for the car:

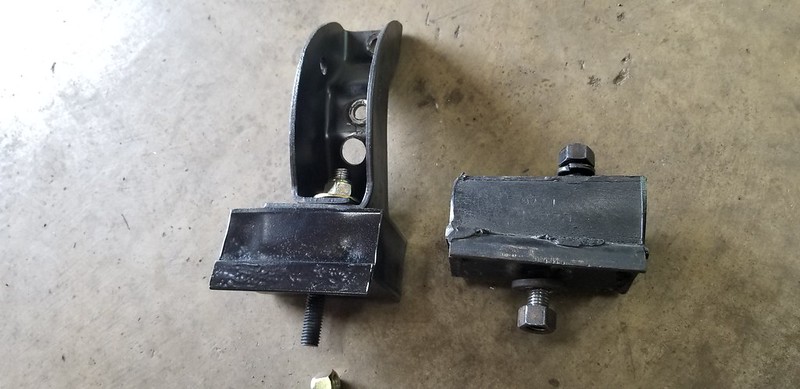
- Install the new Polyurethane Motor Mounts from www.polybushings.com
Old Mount on Right, Poly on Left. - The old Rubber Style Mount Was A Recent Parts store Replacement and Was already Moving around a bit.
Image

- Swap to a new steering box - front header needs to be removed to do this swap, and since it was out for the motor mount swap already, it made sense to do it now.
Image
Image

- And lastly, fix the god forsaken '60-'66 Mopar A Body Fuel Cap / Filler Neck Issue.
The left quarter panel on my car **had** nice paint on it until April 2022 when I took it to CMP, there it's a clockwise flow to the track layout meaning lots of repeated long / hard right turns.. Well on those right hand turns the gas sloshes back up the filler neck quite a bit, it ends up coming out of top of the filler neck and the cap can't hold it back, so it ate my paint away.
Image

I have been thinking of a solution for a while, tried better / more / thicker gaskets on the cap, that failed, thought about relocating the filler inside the trunk, then I came up with this...
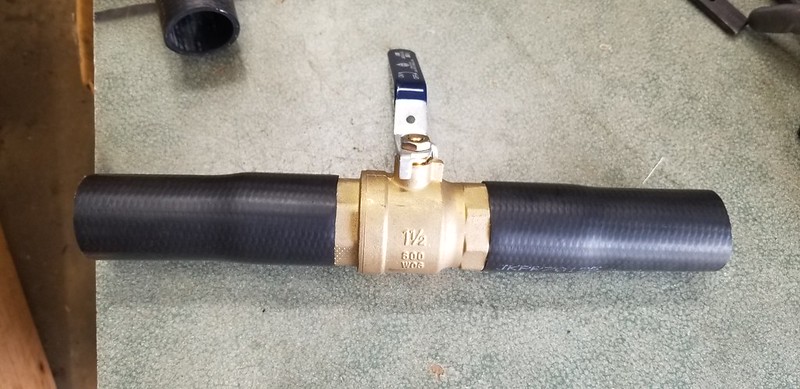
Get some 1.75" Inside Ø Fuel Hose... Continental 59211 will work..
Image
Image

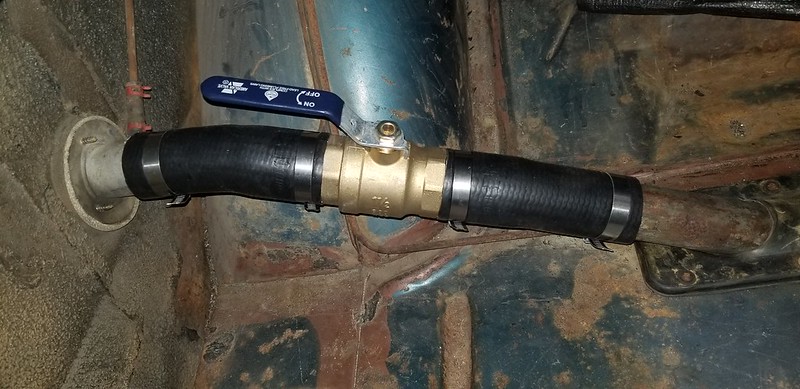
And a 1 1/2" Ball Valve with 1 1/2" x 3" Pipe Nipples threaded on both ends.
Image

Cut out the appropriate amount of fuel filler neck:
Image

Replace the Removed section with the valve.
Image
Image

Close valve for track day, AutoX, or spirited mountain driving.
Image

' Till Next Time!

Page 29 of 35 All times are UTC-08:00
Powered by phpBB® Forum Software © phpBB Limited
https://www.phpbb.com/