Slant Six Forum
https://slantsix.org/forum/

My brother's "new" 74 Duster
https://slantsix.org/forum/viewtopic.php?t=33926
Page 1 of 12

Author:  Reed [ Sun Feb 22, 2009 7:12 pm ]
Post subject:  My brother's "new" 74 Duster

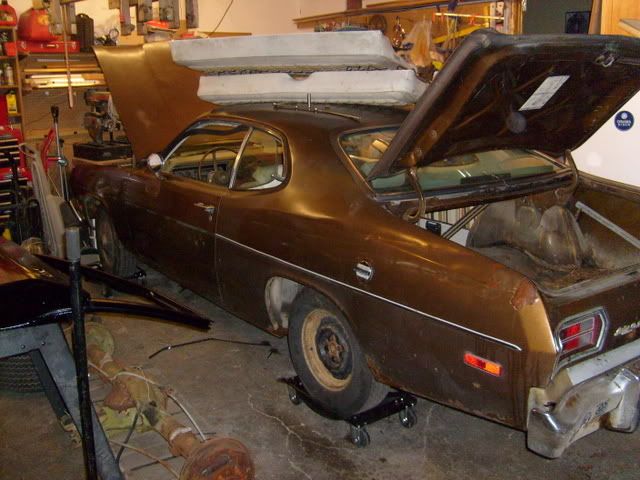
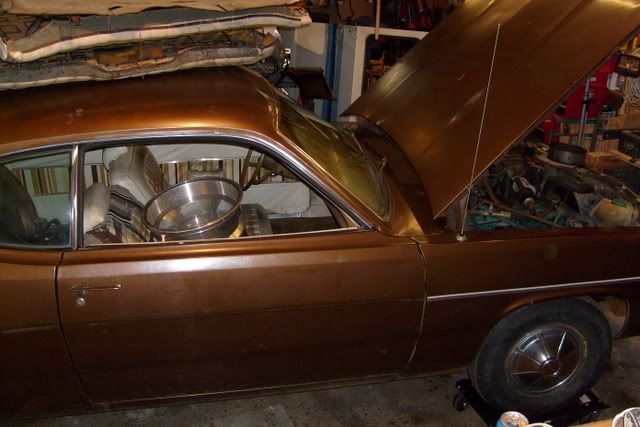
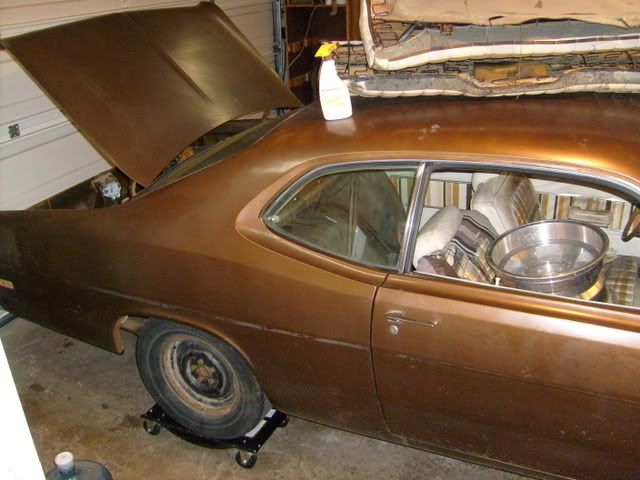
Well, today my brother and I dragged his new project car home to my place. It is a 74 Duster. Mostly it needs consmetic work since it is already a running and driving car. But, boy, does it need cosmetic work. Bodywork, rust repair, dent repair, repaint, whole new interior, etc... It needs a major tuneup since it does run but is tricky to start and keep running. The tranny seems to work fine and there is surprisingly no noise from the 7 1/4 rear axle.

Future plans include disc brake upgrade, 8 1/4 rear axle upgrade, replacing the original rusted out exhaust and blown muffler (it is still relatively quiet though...) slotted mags, engine improvements, getting the A/C fixed, windshield replacement, repaint the car black, redo the interior in red with later model bucket seats, etc... etc...

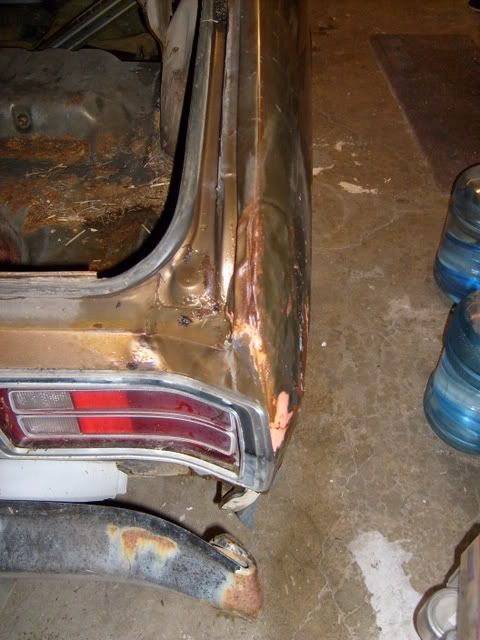
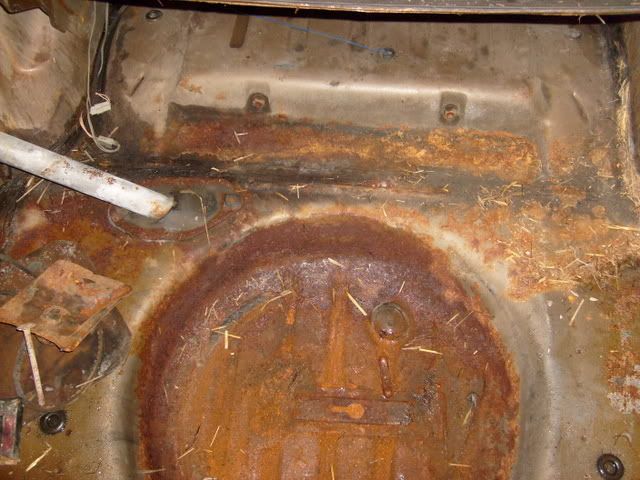
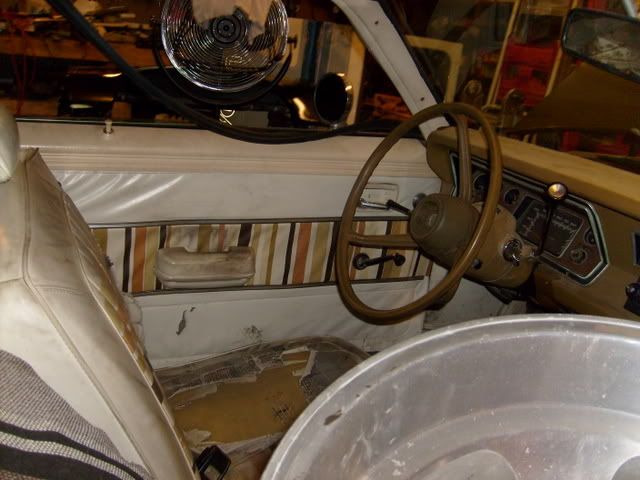
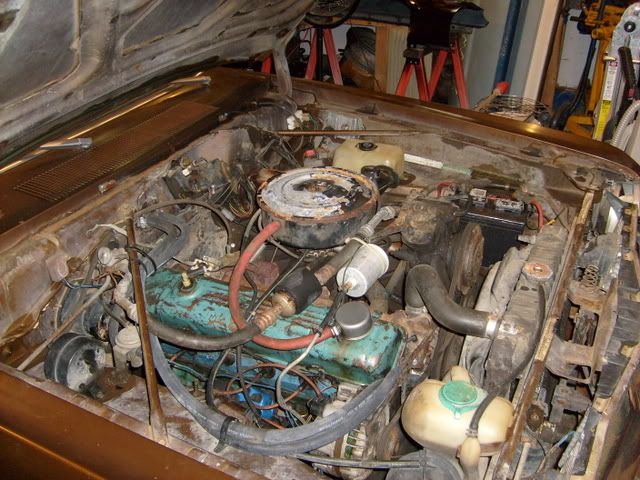
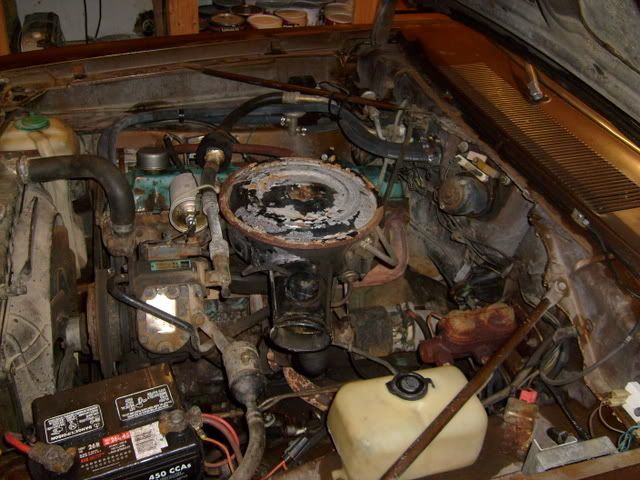
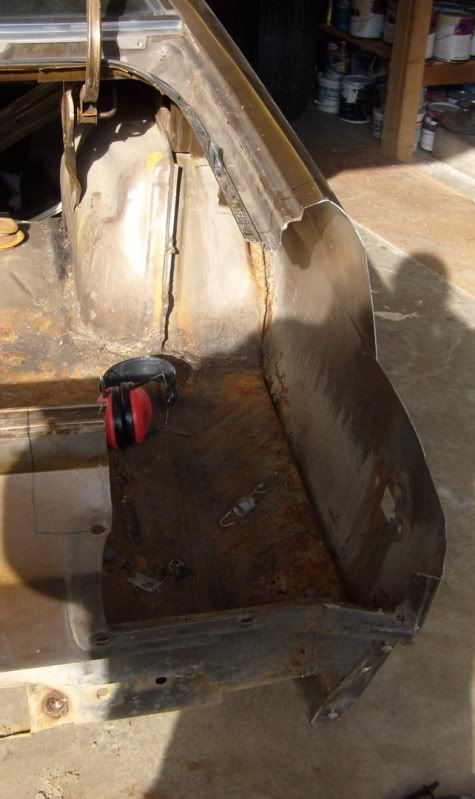
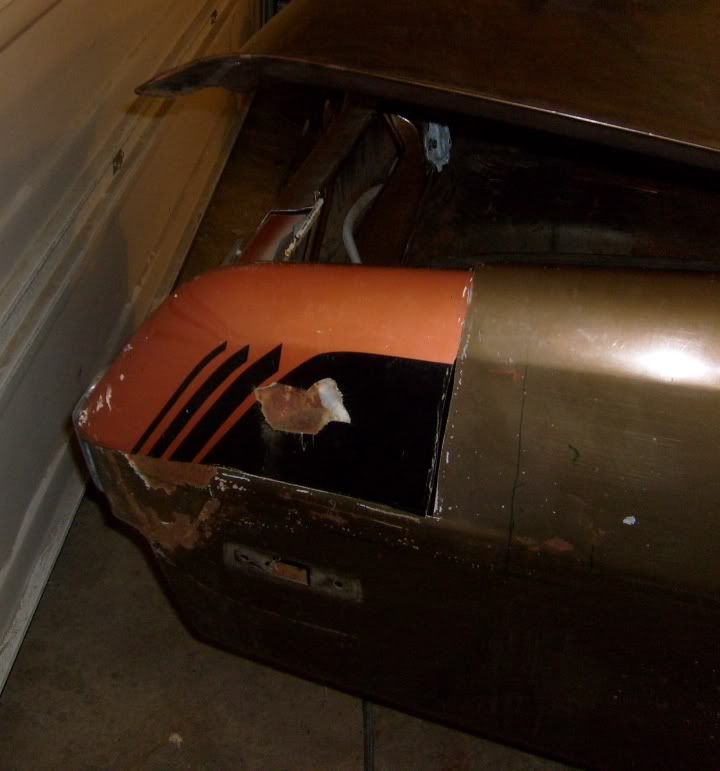
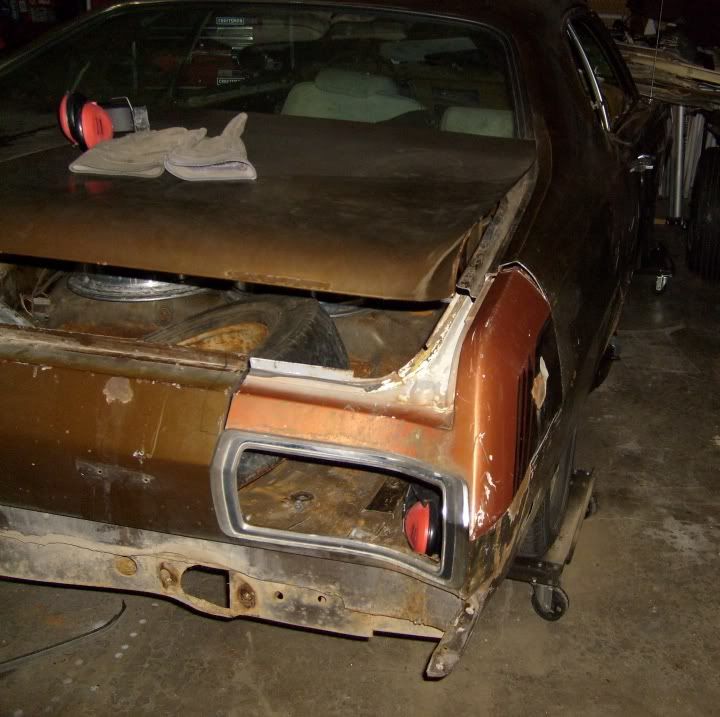
Here are some pictures, and these are AFTER the car was taken to a coin op car wash and blaster with soap and the foamy brush.
Image

Image

Image

Image

Image

Image

Image

Image

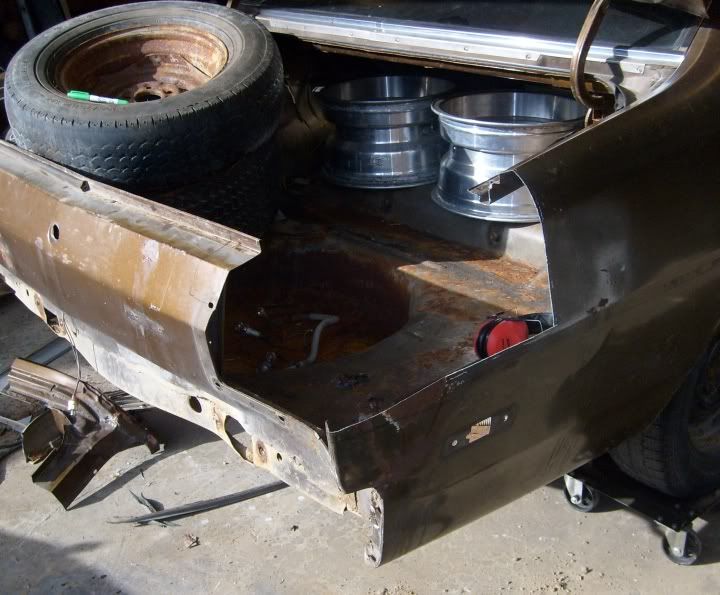
Some of you may remember me mentioning in an earlier post that the trunk hasn't been opened in several years and the guy we bought the car from didn't know what was in the trunk. Well, I pulled the back seat, removed the cardboard divider, unbolted the trunk latch, opened the trunk and discovered, HAY! Yes, a square of indoor/outdoor green plastic carpet covered with hay. Under the hay was the jack, spare tire, a spare ballast resistor, and surprisingly little rust. I am very happy with how solid this car is. Other than the body damage and the minor rustout on the driver's rear 1/4, this Duster appears to be very rust free.

The odometer reads 93,3xx, but I feel confident there should be a 1 in front of that.

So, I am about to embark on a several year long modification project with my brother and his Duster. Originality will not be important, but keeping costs down will. Lots of labor, as much customizing as we can get away with. I am planning how to fabricate some zoomies already. :twisted: We might be switching the Duster front clip with one from a 67-69 Dart. But that will be pretty far down the road and may or may not happen. My brother is a computer repair tech at an Apple store in Seattle, so maybe we will build a custom center console with an on-board computer built out of an Apple Mini. The hard part would be the monitor, but maybe we could use a 12 inch laptop display.

Anyway, wish me luck! I'm going down the rabbit hole again.
Author:  Eric W [ Sun Feb 22, 2009 10:57 pm ]
Post subject: 

Hmmm, only see red x's. I'll see it this weekend though! 8)

Author:  wvenable [ Mon Feb 23, 2009 3:36 am ]
Post subject: 

Looks like a good one to start with! I need to find one of these for my son. Good luck with this project.

Author:  Reed [ Mon Feb 23, 2009 8:37 am ]
Post subject: 

Quote:
Hmmm, only see red x's. I'll see it this weekend though! 8)
Really? That's odd. The pictures are hosted on photobucket and I have never had a problem before. I know sometimes they go offline for maintenance. Maybe that was when you looked?

I will be keeping you guys updated with this as it progresses. The worst part will be fixing the damage to the rear 1/4s. Otherwise it is fairly straightforward.

Author:  Eric W [ Mon Feb 23, 2009 11:19 am ]
Post subject: 

Hey, now I see it! I've seen alot worse. You can get patch panels for the lower quarters from various sources...don't know if I would mud the rust on that car. My sister had a '70 Valiant that was the same color...cool! 8)

Author:  Reed [ Mon Feb 23, 2009 11:25 am ]
Post subject: 

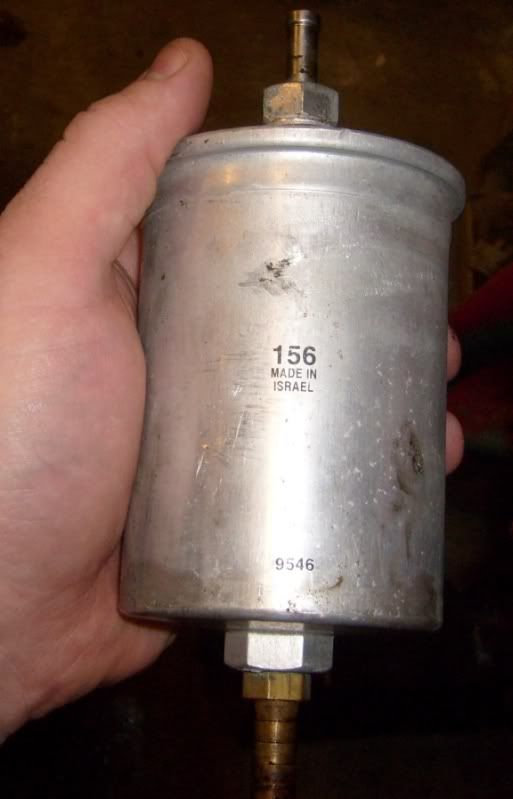
If you look closely, you can see that someone has already done the vaunted "fuel line mod", but has used the biggest fuel filter I have ever seen! I wonder if that fuel filter is part of the difficulty in getting the car started.

No Bondo will be applied directly over rust. I am anticipating stripping both rear 1/4 of paint almost completely to deal with rust and dents. This is bringing back memories of my old Barracuda.... :roll:

Author:  DusterIdiot [ Mon Feb 23, 2009 6:14 pm ]
Post subject:  Wow...

There's a gal who lives in Aumsville that has several 'mint' dusters (she bought them new at the dealership...)... She has a white '74 that has the same panels and seat inserts you have, yours will be the only other car I've seen with the 'striped' trim... this is about as hard to find as the 1975 'Baton Rouge' trim...which later was coded as the 1976 'Silver' Duster trim package...

LOL...

-D.Idiot

Author:  THOR [ Mon Feb 23, 2009 8:14 pm ]
Post subject: 

The interior reminds me alot of mine in the Hang 10... I've never seen an interior like that before... that's awesome! Seems like a sweet starter car to boot....

~THOR~

Author:  Reed [ Mon Feb 23, 2009 9:14 pm ]
Post subject: 

Well, those striped panels are going away. I knew they were somewhat rare, so I will be carefully removing them and most likely will put them up for sale at some point. The front seat is trashed, but the back seat is near mint, just dirty. Yeah, the Tahitian Gold poly with the white/brown/gold disco stripes must have been quite a sight when new. Cue the Brady Bunch.

Author:  Reed [ Sun Mar 15, 2009 7:49 pm ]
Post subject:  Day 1 Report

So my brother came down from Seattle today for Day one of the project. We got alot accomplished.

Image

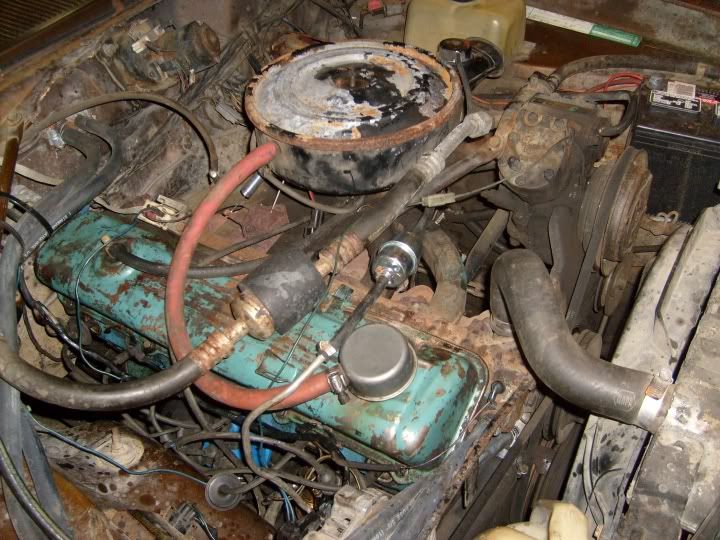
I got the motor running good. Turns out the rotor had been advanced a few too many teeth and the distributor still had the old slotted hold-down so it wouldn't rotate far enough to run. I retarded the rotor, replaced the plug wires, replaced the gargantuan Israeli fuel filter, and it fired right up.

Image

Right after it fired up gas came pouring out of the carb from the accelerator pump hole in the air horn and from between the upper carb body secion and the float bowl. Fortunately I had a spare Holley 1945 that has been collecting dust under my workbench for a few years. I crossed my fingers and swapped them out. The old carb base gasket had been glued down with something but was so dry and brittle it crumbled when I touched it! Weird. The new carb fixed the leaking problem and the old slant actually ran fairly well.

I adjusted the valves to .012 intake and .022 exhaust and let the poor old thing run for a good half hour to burn out the crap in the cylinders and exhaust that accumulated from sitting for two years outside.

I replaced the PCV hose that had been removed, replaced the air filter which was completely clogged, an set the curb idle speed, mixture, and curb idle timing. When all was said and done, it idled smoothly, ran strong in gear with the brakes on, and got 15-16 inches of vacuum with the timing set at the factory setting of TDC.

While I worked on getting the motor running right, my brother went to work stripping the interior. The faded/rotten/stinky carpet went in the garbage, but we saved the cracked and sunbaked plastic trim and door panels. This will all need to be replaced. The plastic is very brittle and cannot be re-used, and all the door panels are sun rotted and the vinyl is also brittle.

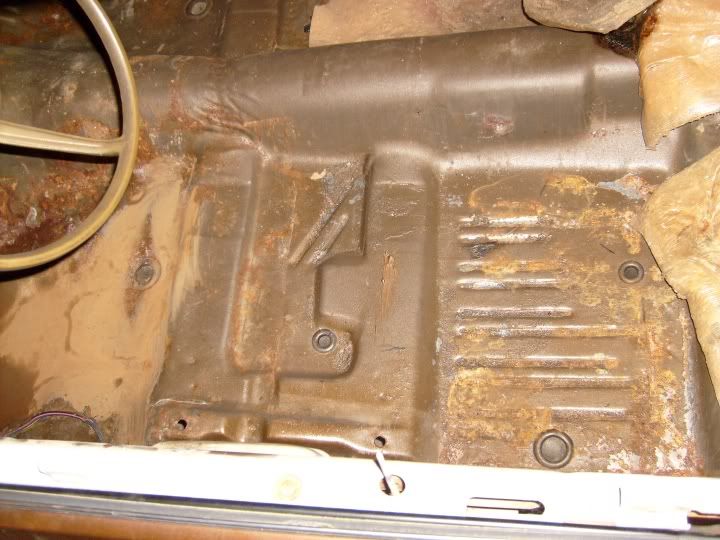
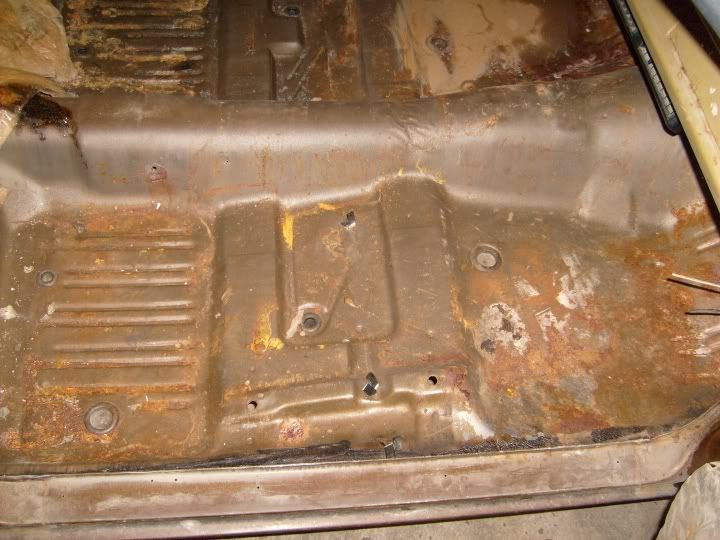
To my great amazement and great joy, when the carpet was pulled the floors turned out to be totally solid with only very light surface rust!

Image

Image

These have to be the cleanest floors I have ever seen in an a-body. I think much of it is because the car obviously spent much of its life someplace sunny, and the car has factory A/C so it doesn't have the fresh air vent holes cut in the bottom of the cowl. I figure I will do a quick pass with a wire brush and just paint the floor with some self etching primer. No welding. 8)

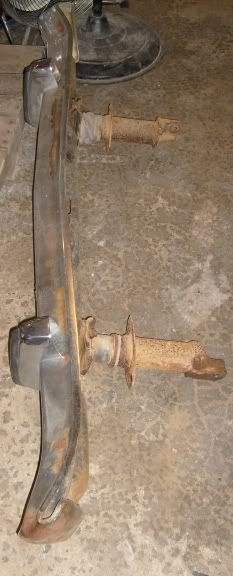
Next up was pulling the complete bent rear bumper and the 5 MPH bumper shock.

Image

All was going well until we got to the last bolt on the passenger side bumper shock. It was the big one that passes through the frame rail under the trunk. I got it about 1/2 way out but then it locked up solid due to the rust and dirt buildup on the threads. I tried whacking the ratchet with a 12 pound sledgehammer which got the bolt to move a little, but eventually the nut welded to the inside of the frame broke loose. :evil: I finally broke out the Sawzall and stuck the blade between the frame and 5mph bumper and cut the bolt in half. Whew.

I believe the car might actually have only 93,XXX miles on it. The brake pedal wear suggests it, as does how well it runs and the condition of the body. I think this might actually be a rare solid original car. I am keeping my fingers crossed our luck holds.

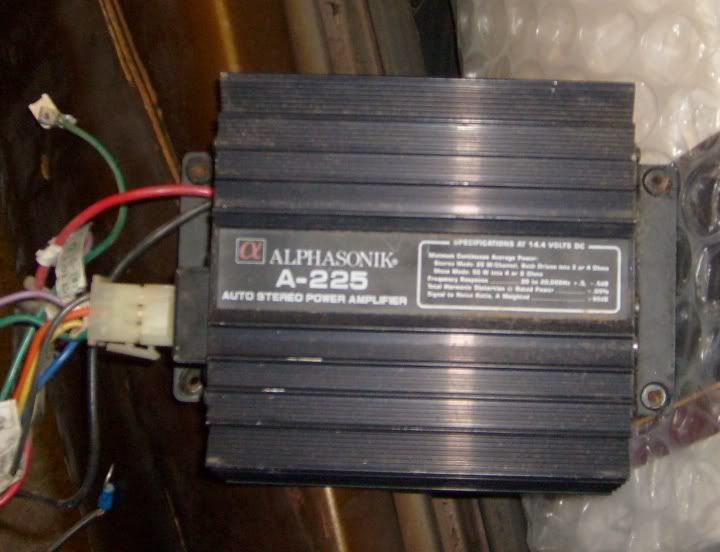
Another fun find was the "Alphasonik A-225" stereo amp in the trunk:

Image

I figure the "A-225" is a good sign, and appropriate. I'll see if this this thing still works.

So now it is time to move on to fixing the bodywork necessary on the rear 1/4s- dent repair on the passenger side, rust and dent repair on the driver's side. Hopefully the replacement panel section I got on eBay will get here this week.

More updates as they happen.

Author:  70valiant [ Mon Mar 16, 2009 3:42 am ]
Post subject: 

I see from the pics there is only one hub cap on the pass front. do you need more, cheap?

Author:  Reed [ Mon Mar 16, 2009 8:27 am ]
Post subject: 

Nope, we have all four, but we won't be using them. We will be switching to 15 inch slotted mag rims. Thanks though!

Author:  70valiant [ Mon Mar 16, 2009 2:37 pm ]
Post subject: 

A-bodies look great with slots. The hub caps are usually in the trunk. I have 3 full sets of 14" hubcaps.

Author:  Reed [ Sun Mar 29, 2009 9:22 pm ]
Post subject:  Day 2

Second day report. Hitting the slow part now. Today we got the rumpled corner cut out:

Image

Image

Any we started trimming the repair panel to fit:

Image

Image

This is very slow and painstaking work, since everything has to line up and be perfect. Maybe one or two days more and we will have it fit and welded. Then it is on to the driver's side rear quarter panel for dent and rust repair.

So not much exciting to report for today, but some significant steps have been taken.

Also, my brother took all the interior panels and the plastic interior trim with him back to Seattle. He knows a guy who fabricates carbon fiber things so my brother is going to have all the interior plastic trim as well as the door panels fabricated in carbon fiber. This includes the windshield pillar covers. I am trying to get my brother to have the guy make a mold for an A-body windshield pillar gauge pod, but we will see what happens. If a mold is made, I will let you guys know.

Author:  volaredon [ Mon Mar 30, 2009 6:39 am ]
Post subject: 

you changed the valve cover huh?? It may be the lighting but in the 1st pic it seemed to show the older ('60's) "ribbed" valve cover on it making me think the motor's been swapped at some point?

Page 1 of 12 All times are UTC-08:00
Powered by phpBB® Forum Software © phpBB Limited
https://www.phpbb.com/