| Slant Six Forum https://slantsix.org/forum/ |
|
| front end rebuild kit https://slantsix.org/forum/viewtopic.php?t=39019 |
Page 1 of 1 |
| Author: | 1974duster [ Tue Feb 16, 2010 11:36 am ] |
| Post subject: | front end rebuild kit |
hey guy it has been a while i plan on rebuild my front end on my 74 duster i have couple question where should i order my kit from ? i am looking at two different web site one is kanter.com not sure if there kit is rubber or polyurethane and the other web site is performance suspension which is polyurethane, also there is $100 difference between the two kits. other question i had is how do i take the torsion bars out ? and the last question is is there any tool i need for the job i already have ball joint separator thanks for the help |
|
| Author: | 66aCUDA [ Wed Feb 17, 2010 6:32 am ] |
| Post subject: | |
I got lucky and found a guy that had all OLD Moog stuff so I cant help there. Are you going to have someone do the press work? If not you will need a Floor Press, Also a ball joint socket for the right size (they are about $30), PB Blaster and start on the nuts and bolts 1 week in advance. Figure on replacing your Brake Hoses. If you want to upgrade your brakes NOW is the time to do it. Remember that Poly bushings have a tendency to Squeak you may want rubber. Do a search on here for suspension and it may return more info. Frank |
|
| Author: | DusterIdiot [ Wed Feb 17, 2010 6:38 pm ] |
| Post subject: | Yep... |
Rubber is fine and will have the same ride you have now but much better...If you get an all poly kit, you may want to try to get the LCA bushings in rubber... 
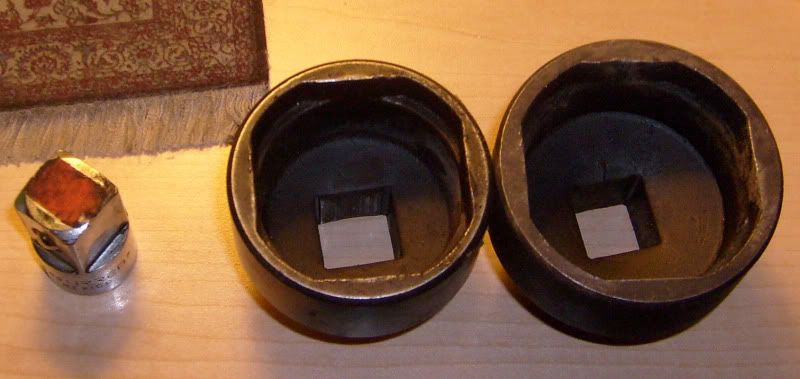
You will need the special ball joint socket and a large breaker bar, or find a buddy with a 3/4" air impact gun... Luckily if you can catch up to him and work up a deal with him, Ceej in Halsey has the press and some "dies" for the job, he has done a few of these (and recently helped me..THanks CEE!...I still have a 'J' to give you!) PM him and see if he has time... your best bet is to get it all disassembled, get the balljoints removed while still bolted in the car, take everything to a machine shop and pay the $10 to have them clean everything up...then go get 'R Done. Torsion bar removal without the tool is kind of 'fun'... I prefer to remove all the brake parts/spindle and UCA's to take the load off them... Loosen the LCA pivolt nuts...remove the torsion bar adjusting bolts and washers...remove the strut nuts both ends...go to the crossmember and with a pair of pliers pull the "O" clips out of the sockets torsion bar anchors...sometimes I squirt a bit of PB Blaster in the LCA torsion bar socket to loosen up any grime and old grease... Run torsion bar pivot nut out to end...use big rubber mallet and hit it good...that should get it loose...if not you can also pound on the LCA until the LCA clears the pivot in the KMember as well... you can leave the Torsion Bar where they are if not upgrading (1974 you have good bars unless you have a set of 340/360/-A/C car bars to install)... A lot of swearing helps too... Good Luck! -D.Idiot |
|
| Author: | 1974duster [ Fri Feb 19, 2010 7:49 am ] |
| Post subject: | |
i guess it is a good thing i have air impact gun i have part of the passenger side taken apart right now i am clean the upper arm and plan on painting it too i think i have every thing taken apart i will paint the inner fender it looks good i know that i will have to replace the driver side the battery has cause it to have rust though it thanks for the help guys also i have torsion bras from a 318 should i put them in or not |
|
| Author: | slantfin [ Fri Feb 19, 2010 2:20 pm ] |
| Post subject: | |
I made a little device out of a piece of angle iron bolted to a piece of bar stock that clamped around the torsion bar, and then used a small bottle jack sideways to push the torsion bar out of the LCA. It was being stubborn, but this worked with no effort, and not much swearing. You said torsion "bras" lol. |
|
| Author: | 1974duster [ Fri Mar 05, 2010 9:10 am ] |
| Post subject: | |
so i have a question before i take out the torsion bars is there anything i should do before hand |
|
| Author: | radarsonwheels [ Fri Mar 05, 2010 12:30 pm ] |
| Post subject: | yeah |
like they said- back off the adjuster, loosen the lower control arm pivot, remove the t-bar retaining clips in the trans crossmember Be careful not to nick or scratch the T bars they are trash if you damage them. Oh and pull the upper ball joints before you pull the UCAs the car is the best fixture for holding them still to be able to torque on them. |
|
| Author: | 1974duster [ Fri Mar 05, 2010 1:38 pm ] |
| Post subject: | |
so i don't have to worry about ride height at all |
|
| Author: | olafla [ Fri Mar 05, 2010 3:51 pm ] |
| Post subject: | |
Hey 1974duster, I've been searching for front end parts for a major overhaul of my '77 Aspen, and I have come up with a lot of good Mopar sources. Take a look at springsnthings.com, they have all poly stuff you need. If you don't find it in their lists, give them a call and they'll fix it! Cheap and GOOD! (They also have new rear springs if they get saggy!) Another good poly source is the maker of the motor mounts in the group buy, polybushings, but the selection of parts is limited. If you need stock parts, RockAuto have all you need, but also heavy duty parts like brake pads, gas shocks and drilled front brake rotors, and their prices are very low compared to Napa and most others. God luck! Olaf |
|
| Author: | 1974duster [ Mon Mar 08, 2010 9:16 am ] |
| Post subject: | |
thanks for the link olafla i have order my kit from p-s-t.com it took them two days for it to get here which is not bad i am have other problems does any one know the dimension of the upper ball joint i have order a stock to take it off but it was too small but the web site said it was for a body i guess they were wrong so if any one know the Measurements across the flats that would be great i got 2 and 1/8 but i what to see what you guys get since you have been work on these car long than i have again thanks for the help guys |
|
| Author: | Reed [ Mon Mar 08, 2010 9:26 am ] |
| Post subject: | |
I am in the middle of a front end rebuild on my brother's Duster. In addition to basic hand tools and the above mentioned special upper ball joint socket, you will need a cheater bar, and PB Blaster. To remove a-body torsion bars, I made a tool years ago out of two pieces of wood that clamp together with four long bolts. The pieces of wood are about five inches wide, an inch thick, and about six inches long. The bolts pass through both pieces of wood. You clamp the torsion bar in the wood and then whack the wood with a big hammer to remove the torsion bar. A 12 pound sledge works great. As was mentioned above, loosen the adjuster nut on the LCA as much as possible and remove the cli on the back of the T-bar. I also like to slide the rubber gasket away from the crossmember to avoid damaging it. That is all I did. I didn't have to mess with the strut rod or the nut on the front of the LCA stud to remove the T-bar. Also, be very careful removing the cotter pins in the fronts of the strut rods. Mine were very brittle. When I tried to remove the driver's side both ends broke off and I spent two hours drilling and hammering to get the stupid little pin out of the hole. On the passenger side I was more careful and tapped the pin all the way one way and then back again before trying to grip it with pliers. That worked much better. Tell you what, I'll let you borrow my upper ball joint socket if you pay shipping down to you and then back up to me. |
|
| Author: | 1974duster [ Mon Mar 08, 2010 9:32 am ] |
| Post subject: | |
i have all ready order one but i want to get the right size so what size is yours so i can tell the company i order it from what size so i can get the right one |
|
| Author: | Reed [ Mon Mar 08, 2010 10:02 am ] |
| Post subject: | |
It isn't really a size per se, such as a 1/2 inch or 9/16 in socket. Mopar RWD vehicles with threaded upper ball joints use one of two special sockets for removal and installation. The socket is basically a square with rounded corners. There are two sizes, typically the smaller one is for cars and the bigger one is for trucks and vans. Here is a picture of both side-by-side: ![]() You will also likely need that adapter that goes from 1/2 inch dreive to 3/4 inch drive. The part number on my smaller UBJ socket is: Wright brand socket, part no. 6888. The bigger socket is a S/K brand 2 1/8 socket, part no. 84689 These are really single purpose items since they only fit Mopar ball joints. I bought my smaller ball joint socket about ten years ago and it cost me $23.50. That's a pretty step price for a tool I have used maybe twice. The bigger socket I think was around $30 about five years ago. However, nothing beats having the right tool for the job. |
|
| Author: | Louise76 [ Mon Mar 08, 2010 1:17 pm ] |
| Post subject: | |
Another experience: on my 74 & 75 Darts/Valients with S-6's & factory disc brakes, I used MAC Ball Joint socket (1/2" drive) #SC29 at 1-29/32". (Mac also has SC30 at @ 2- 1/8", and SC52 at 1-25/32".) They ain't cheap, but after stumbling through my first attempt many years ago using a 24" plumber's pipe wrench and a 5 foot cheater bar with a torch, I vowed to never be stupid enough to try that again. I actually found an old Rental Store that had the sockets and breaker bars to rent! There are several different manufacturers of aftermarket ball joints, and I found some fit the SC29 perfectly, while some need help from a BFH. A torch and PB Blaster rules on removing the upper ball joints! After cleaning the holes out with a rotary wire brush, I put the new ones in with copper anti-seize applied liberally, as the UCA isn't really "threaded" as you would inagine. I think the factory just pressed them in, with quasi-threads for removal. Other forum members may have better ideas on this but this method has been working for me. As others have said, for using a hydraulic press you can get an assortment of plumbing stuff at the hardware store to put together punches and receivers for all the bushings. And borrow misc sockets and steel plates and stuff from friends. I found out the hard way to lube (grease, or whatever) the bushing casings and holes when you press in the new bushings, or they may gall jam/deform during the pressing-in. Being pretty uncertain of my ability to re-assemble everything, I painted alignment marks on ever part and nut and bolt before taking anything apart, and counted and recorded number of turns when un-screwing anything. I found that I may not have needed all the marks, but they were really re-assuring to see when everything was going back together. I've done 2 1/2 Darts now, with the third coming up. Others may have their preferences, but I just went with MOOG stock parts, and they seemed ok for our daily drivers. Pat |
|
| Author: | olafla [ Mon Mar 08, 2010 5:56 pm ] |
| Post subject: | |
Hi 1974duster. I hope I'm not offending you, but you write like it is intended for a telegram; no need for one long sentence, the price is the same - zero! Your posts would be a lot easier to read with some punctuation marks and commas here and there. Olaf |
|
| Page 1 of 1 | All times are UTC-08:00 |
| Powered by phpBB® Forum Software © phpBB Limited https://www.phpbb.com/ |
|