Slant Six Forum https://slantsix.org/forum/ |
|
70 Slant-Six Head Gasket Replacement & Gasket info https://slantsix.org/forum/viewtopic.php?t=60571 |
Page 1 of 2 |
Author: | daisydart [ Sun Dec 18, 2016 3:59 pm ] |
Post subject: | 70 Slant-Six Head Gasket Replacement & Gasket info |
I've been trying to trace an oil leak on my Dart's slant six and I've cautiously narrowed it down to my head gasket (rear of motor, passenger side) I have already replaced the valve cover gasket, the drool tube seals and have removed the alternator mounting bracket and reinstalled it using locktite thread sealant on all the bolts, but the leak persists. Looking at the small amount of gasket that I can see, it appears as if it's a composite head gasket. After checking gasket availability I realize I may not be able to obtain an original thickness replacement steel gasket. After doing research I realize that the replacement composite gaskets are thicker than OEM, and if installed without milling the head in accordance to the new thickness of the replacement gasket there could be a potential loss in the engines compression ratio. My engine was rebuilt a couple years ago prior to my ownership but unfortunately I don't have any specific information to tell me the machine work done to the motor and head just that they had been rebuilt; so I don't know how much has already been milled off during the engine rebuild process. With that being said if I attempt to replace the head gasket with another composite gasket should I be concerned with the extra thickness of the new gasket? And should I be considering milling my head to obtain at least the factory compression ratio if the machine work had not been done to accommodate the thicker gasket? Lastly, is there a chance that I might still be able to obtain an OEM style steel head gasket that is the correct thickness and/or do engine re-builders take this machine work into consideration when doing a rebuild using a thicker composite gasket to compensate for the loss of factory compression ratio? I am trying to choose the best line of attack for this project, any help or guidance is appreciated. Thank you. |
Author: | Reed [ Sun Dec 18, 2016 6:04 pm ] |
Post subject: | |
I think about half of the dozen or so slants I have owned and played with over the years have had that leak. Fresh rebuilt and machined engines, old and grimy stock engines that have never been apart. My cure it to wipe it down dry and smeak a line of RTV sealant in the crack between the head and the block at the rear passenger side corner. |
Author: | Rick Covalt [ Sun Dec 18, 2016 7:06 pm ] |
Post subject: | |
Did you try and re-torque the existing head gasket? And maybe even give it an extra few pounds. If I pulled the head I would definitely plane the head to get the CR up a bit. Take some measurements and see what the actual CR is first. The steel shim head gaskets are around but if you want to avoid the odds of another head gasket leak, you may want to go with the composite one. 2 cents! |
Author: | daisydart [ Mon Dec 19, 2016 8:09 pm ] |
Post subject: | |
Quote: I think about half of the dozen or so slants I have owned and played with over the years have had that leak. Fresh rebuilt and machined engines, old and grimy stock engines that have never been apart. My cure it to wipe it down dry and smeak a line of RTV sealant in the crack between the head and the block at the rear passenger side corner.
Thank you for the advice, I will try some RTV sealant and run the engine again to see if the leak persists.Quote: Did you try and re-torque the existing head gasket? And maybe even give it an extra few pounds.
Yes actually I did re-torque the head in hopes it would stop the leak and found that it had been missing torque across all bolts, I was able to torque it down another 15-20 pounds before it was tightened to 65 ft/lbs. If I pulled the head I would definitely plane the head to get the CR up a bit. Take some measurements and see what the actual CR is first. The steel shim head gaskets are around but if you want to avoid the odds of another head gasket leak, you may want to go with the composite one. 2 cents! Is there any simple way to measure the compression ratio without first removing the head? And if I do remove the head to replace the gasket, are the head bolts torque to yield type? Will they have to be replaced or can they be re used? Thank you |
Author: | DusterIdiot [ Mon Dec 19, 2016 9:01 pm ] |
Post subject: | Yes... |
Quote: Will they have to be replaced or can they be re used?
They can be reused, no problems. Make sure the bolts are clean and the threads in the holes in the block have been chased and cleaned out and it will all be good to go.Quote: Is there any simple way to measure the compression ratio without first removing the head?
No. It's a measurement of volume so you need to know the depth of the piston from the deck of the block to the top of the piston at top dead center and bottom dead center, and the volume of the combustion chamber.... which is easy once the head is off...Technically speaking, a loss of 0.020" on a 8:1 engine isn't a really major power loss compared to say a hi-compression race engine where that kind of difference can be a dramatic swing.... I would not sweat it if the engine was 8.1:1 or 8.4:1.... either way if you took the time to make sure the cam was degreed in and advanced a few degrees you might get a seat of the pants feel of a bit more torque.... If you use the OEM shim gasket you will have to make sure that both the deck on the block and the mating surface on the head is clean and flat (measured with a machinist edge and tape... or in a pinch true edge and feeler gauge)... the composite gasket is more forgiving if either surface is out .003-.005... If you do install a new head gasket, do like Reed had mentioned RTV the seam between the head and block on the back and along the lifter gallery to prevent oil leaks....(this will not prevent leaks if it's the spark plug tubes or seals that need to be replaced...) |
Author: | daisydart [ Sat Dec 31, 2016 4:40 pm ] |
Post subject: | Re: Yes... |
Quote: Quote: Will they have to be replaced or can they be re used?
They can be reused, no problems. Make sure the bolts are clean and the threads in the holes in the block have been chased and cleaned out and it will all be good to go.Quote: Is there any simple way to measure the compression ratio without first removing the head?
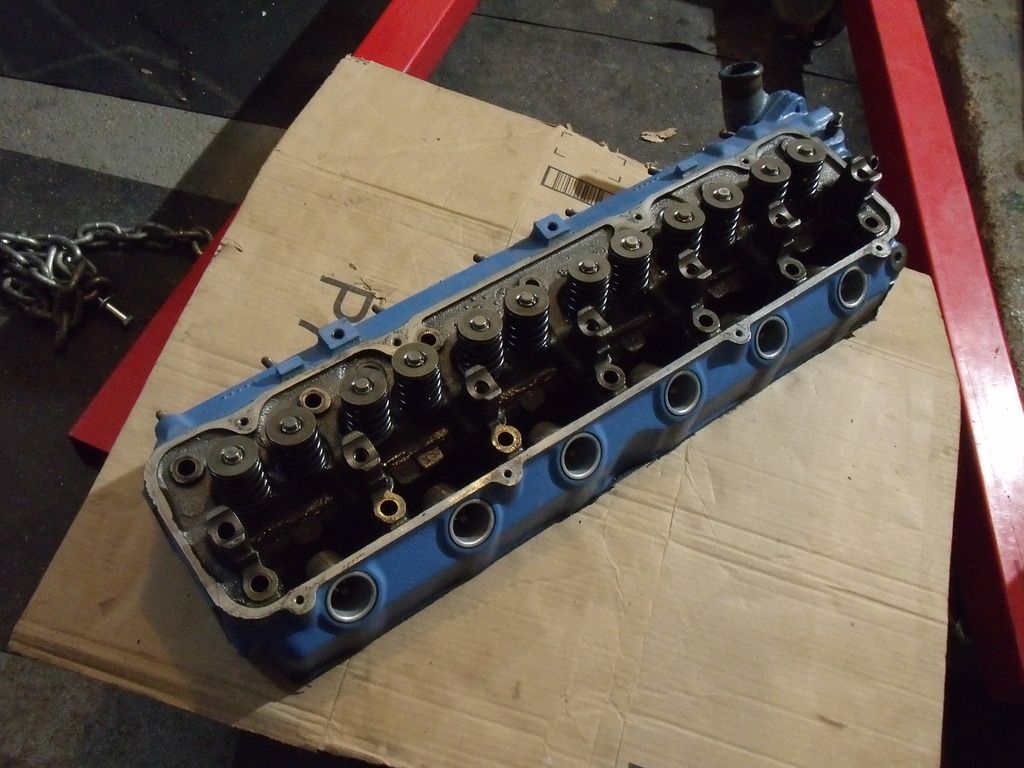
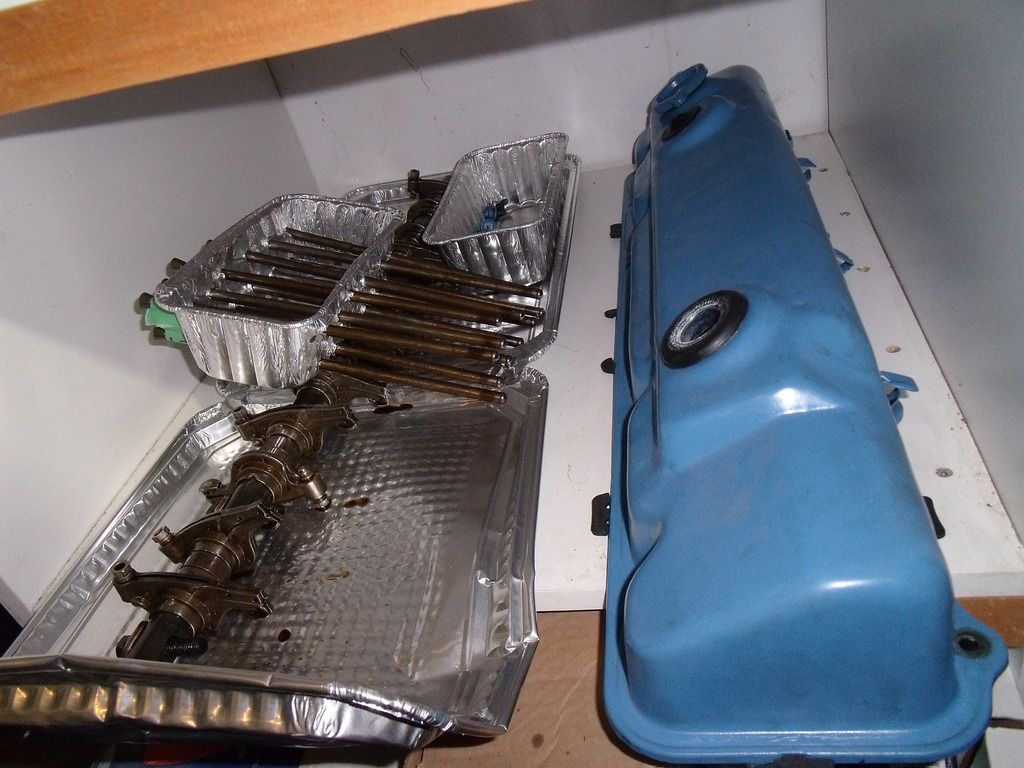
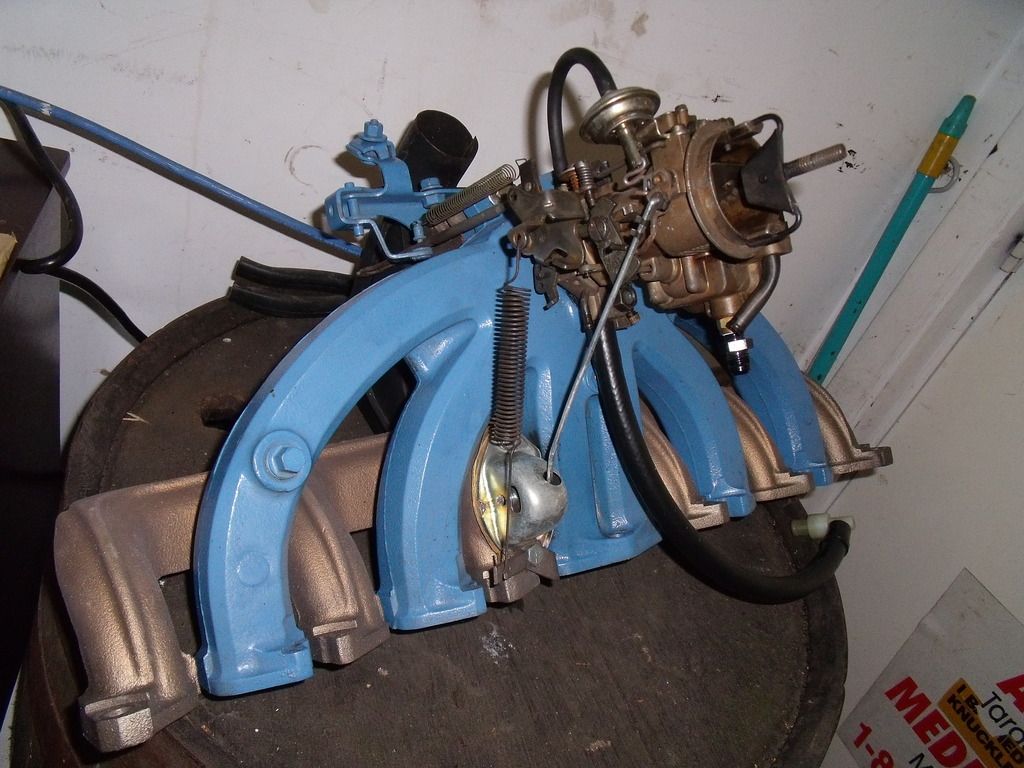
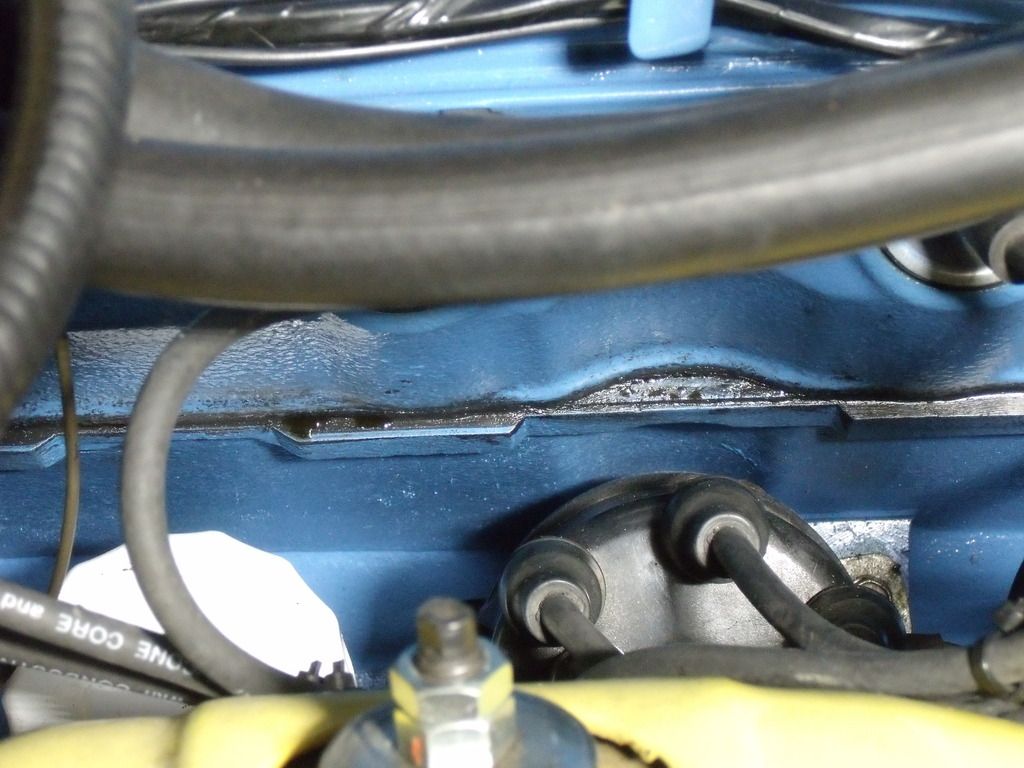
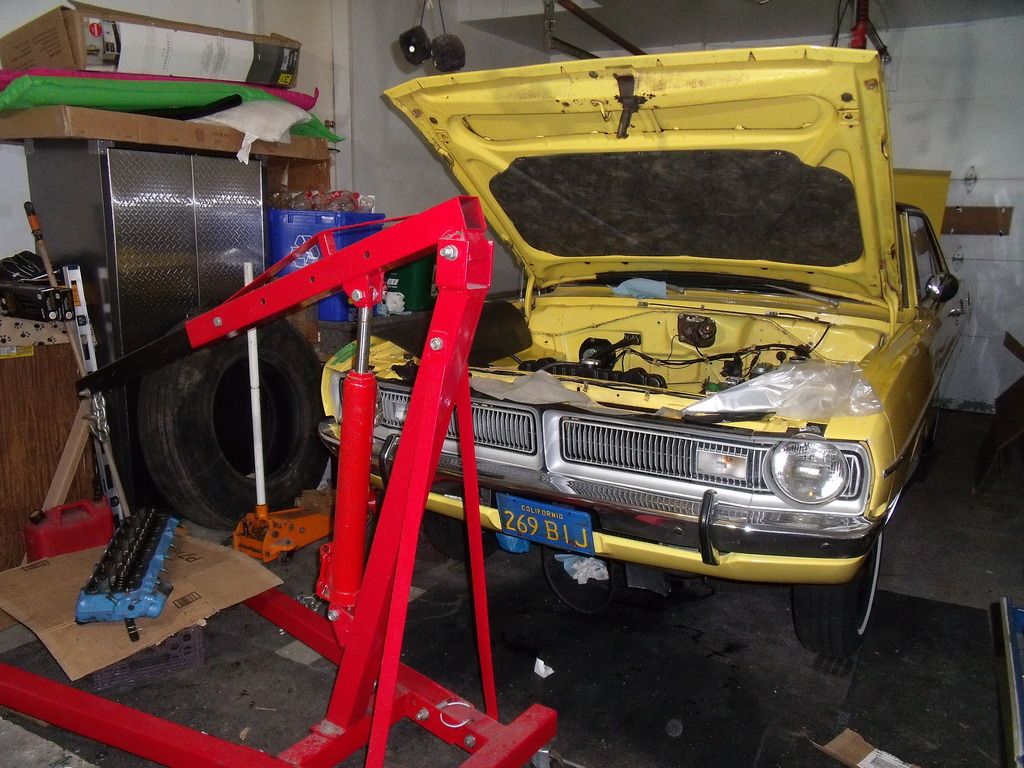
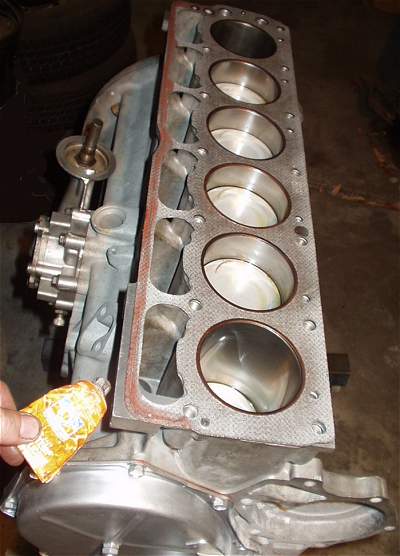
No. It's a measurement of volume so you need to know the depth of the piston from the deck of the block to the top of the piston at top dead center and bottom dead center, and the volume of the combustion chamber.... which is easy once the head is off...Technically speaking, a loss of 0.020" on a 8:1 engine isn't a really major power loss compared to say a hi-compression race engine where that kind of difference can be a dramatic swing.... I would not sweat it if the engine was 8.1:1 or 8.4:1.... either way if you took the time to make sure the cam was degreed in and advanced a few degrees you might get a seat of the pants feel of a bit more torque.... If you use the OEM shim gasket you will have to make sure that both the deck on the block and the mating surface on the head is clean and flat (measured with a machinist edge and tape... or in a pinch true edge and feeler gauge)... the composite gasket is more forgiving if either surface is out .003-.005... If you do install a new head gasket, do like Reed had mentioned RTV the seam between the head and block on the back and along the lifter gallery to prevent oil leaks....(this will not prevent leaks if it's the spark plug tubes or seals that need to be replaced...) Thank you for the tips and suggestions. Today I removed the head and quickly found all the answers to my questions. The gasket used was a Victor Reinz gasket and no RTV was used under the lifter gallery. I also calculated the compression ratio and ended up with 8.25:1. The surfaces are flat so I think I am just going to replace the gasket and add the sealant to the lifter gallery area. The teardown was quick today. For those interested here are the measurements I took with the head removed. Bore and Stroke (book values) 3.4" Bore / 4.125" Stroke. Deck clearance: 0.155" Compressed Gasket Thickness: 0.037" (Victor reinz) Cylinder head volume (estimated): 56cc Compression ratio calculated: 8.25:1 Here are a few pictures. After smearing some RTV gasket in the crack of the head and the block it made the oil leak a lot more obvious to spot, so with that test it was time to take the head off and order a new gasket. Used the hoist to lift the head out, no sweat no broken back. Thank you for the tips and suggestions to everyone who answered me. |
Author: | DusterIdiot [ Sat Dec 31, 2016 5:21 pm ] |
Post subject: | Good deal... |
Glad to see it was a very straight forward fix... everything looks good. 8.2:1 is fine for a stocker (that was the advertised SCR in the mid-late 70's)... |
Author: | daisydart [ Mon Jan 02, 2017 10:02 am ] |
Post subject: | Re: Good deal... |
Quote: Glad to see it was a very straight forward fix... everything looks good.
8.2:1 is fine for a stocker (that was the advertised SCR in the mid-late 70's)... I feel more comfortable now at least knowing where the engine is at, just needing a head gasket and knowing the compression ratio is reasonable. I do have one remaining question about the re-assembly portion though, the rebuild specs call out a torque of 65 ft lbs with the original style gasket, should I be adding a bit more torque to the new composite gasket? |
Author: | Doctor Dodge [ Tue Jan 03, 2017 8:14 am ] |
Post subject: | |
It is not a problem to go up to 75 ft.lbs. (to be honest, I go up to 100 ft.lbs on some of my race SL6 builds) Be sure to get all the surfaces completely clean and use a good quality RTV along the lifter galley edge... both sides. DD |
Author: | daisydart [ Tue Jan 03, 2017 7:15 pm ] |
Post subject: | |
Quote: It is not a problem to go up to 75 ft.lbs.
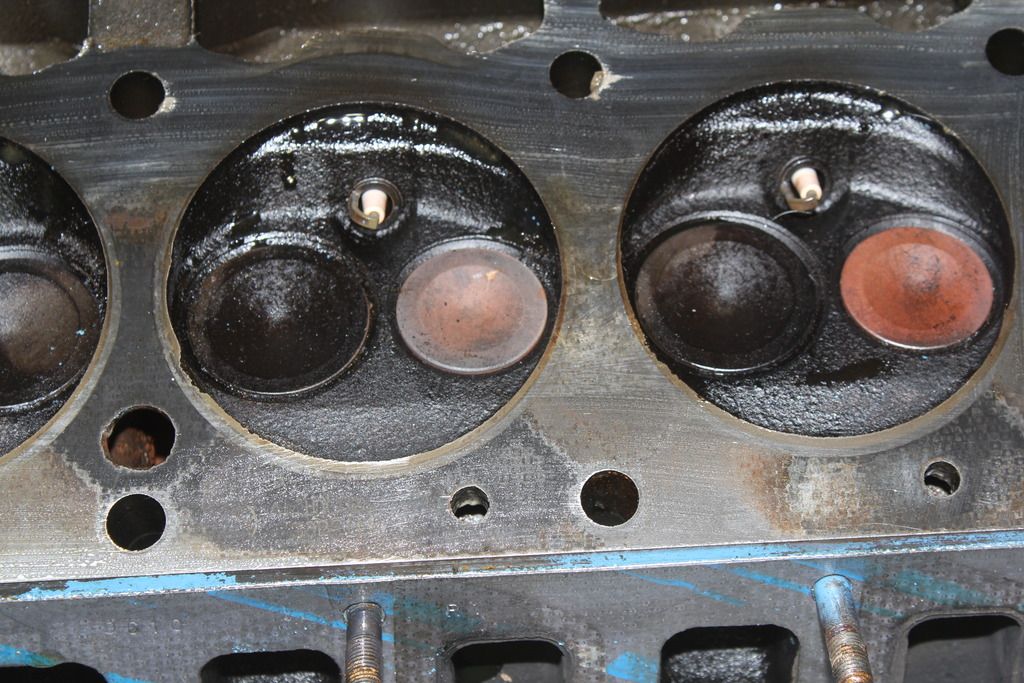
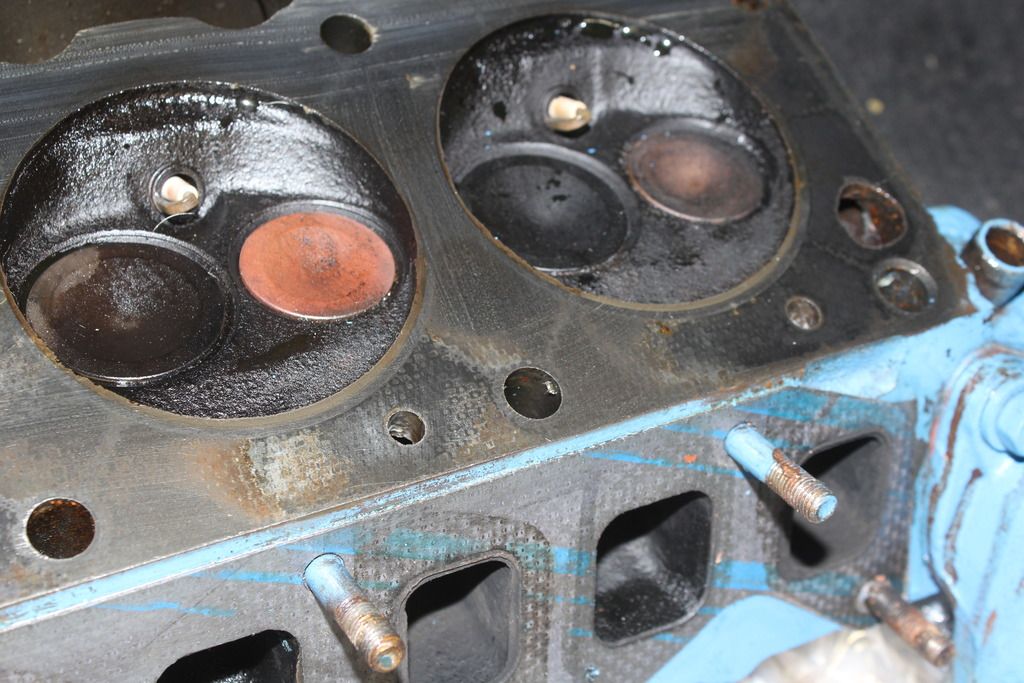
Thank you for the advice about the gasket torque, I will torque to 75 ft lbs. (to be honest, I go up to 100 ft.lbs on some of my race SL6 builds) Be sure to get all the surfaces completely clean and use a good quality RTV along the lifter galley edge... both sides. DD One note about cleaning the surfaces, I have passed a razor gasket scraper over the surface of both the head and the block and used some gasket remover to try and get the surfaces clean but it seems like the old gasket has left what seems like "stains" on the surface, you can see them clearly but cant seemingly scrape any deeper to remove them, even with a new blade. Are these dark areas something I should be concerned about even though they measure and feel flat? I feel like this is as clean as I can get the surfaces using the razor method. I've added some pictures to show what I mean. Should I be trying to get it any better than this or it is what it is? And if so what can I use that wont affect the flatness or surface? I thought scotch brite scuffing pads but am unsure if they might be a bit too abrasive. Thank you. |
Author: | daisydart [ Tue Jan 10, 2017 4:27 pm ] |
Post subject: | |
bump, anyone? |
Author: | Dart270 [ Wed Jan 11, 2017 2:22 am ] |
Post subject: | |
As long as the surfaces are dry of oil or other chemicals, then you should be fine. However, scotch brite cleanup should give you no problems. Then, make sure to blow/clean off the surfaces and chamber before reassembly. Lou |
Author: | SpaceFrank [ Wed Jan 11, 2017 6:28 am ] |
Post subject: | |
Ditto what Lou said. I typically use scotch brite myself. As long as it feels smooth, those dark marks from the old gasket are not a problem. |
Author: | daisydart [ Wed Jan 11, 2017 9:26 am ] |
Post subject: | |
Quote: As long as the surfaces are dry of oil or other chemicals, then you should be fine. However, scotch brite cleanup should give you no problems. Then, make sure to blow/clean off the surfaces and chamber before reassembly.
Lou Quote: Ditto what Lou said. I typically use scotch brite myself. As long as it feels smooth, those dark marks from the old gasket are not a problem.
Thank you for the confirmation, the surface I feel is reasonably clean and is flat but I will go ahead with the scoth brite in those stubborn areas because I just feel like more will come off if I use the right method. Thanks guys I appreciate your help.
|
Author: | shadango [ Tue Feb 21, 2017 10:05 am ] |
Post subject: | |
I am glad I came across this thread.... The bolts that hold the alternator bracket on go into an oil galley I take it? So a possible leak point? |
Page 1 of 2 | All times are UTC-08:00 |
Powered by phpBB® Forum Software © phpBB Limited https://www.phpbb.com/ |